

PnP (Practices and Patterns) is a community driven open source project where Microsoft and community members have created an implementation pattern for Office 365 and SharePoint on-premises. One of the branches of the PnP development is in PnP Core CSOM Library.
PnP Core library provides CSOM extension methods for SharePoint 2016 add-in model development. The official documentation can be accessed from here. PnP Core library increases the productivity of developers by abstracting complex operations. In this article, we will see how to set up PnP Core library remotely and work with SharePoint 2016, using a console application.
In order to work with PnP Core library, we first have to install the NuGet Package Manager, which is explained in this article. Once the PnP Core library is added, we can kick off the implementation, using a console application.
Project structure
Create a console application and add the below references,
- Microsoft.SharePoint.Client;
- OfficeDevPnP.Core;
Scope of the article will be to perform the below operations, using PnP Core CSOM Library.
- Create Content Type with PnP Core Library
- Associate Content Type to the list
- Set default Content Type for the list
- Remove Content Type from the list
Create Content Type
Let’s see how to create the Content Type with PnP extension method.
- Create the instance of the Authentication Manager which will be used to create the client context.
- //Get instance of Authentication Manager
- OfficeDevPnP.Core.AuthenticationManager authenticationManager = new OfficeDevPnP.Core.AuthenticationManager();
- //Create authentication array for site url,User Name,Password and Domain
- string[] authArray = { "http://sharepoint2016/sites/HOL", "Priyaranjan","password-1","SharePointHOL" };
- Create Client Context by passing the authentication details to the authenticationManager object.
- var clientContext = authenticationManager.GetNetworkCredentialAuthenticatedContext(authArray[0], authArray[1],authArray[2], authArray[3])
- Create the Content Type. The parameters are,
- Content Type Name
- Content Type ID
- Content Type Group Name
- clientContext.Web.CreateContentType("Employee CT", "0x0100A33D9AD9805788419BDAAC2CCB37509F", "Custom CT");
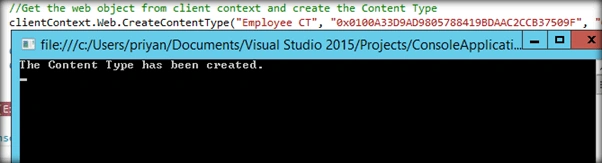
Output
The new Content Type has been created.
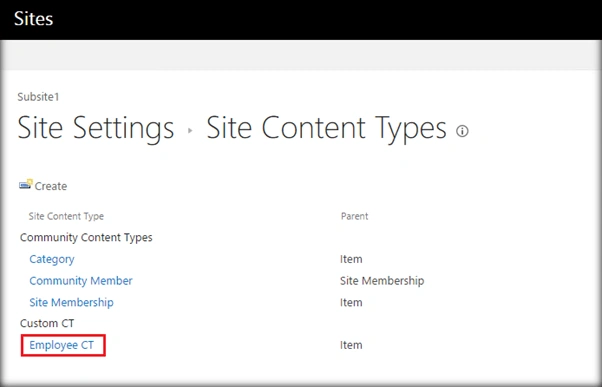
It will be listed in the Site Content Types collection.
Full Code
The full code to create the Content Type is shown below.
- //Get instance of Authentication Manager
- OfficeDevPnP.Core.AuthenticationManager authenticationManager = new OfficeDevPnP.Core.AuthenticationManager();
- //Create authentication array for site url,User Name,Password and Domain
- string[] authArray = {
- "http://sharepoint2016/sites/HOL",
- "Priyaranjan",
- "password-1",
- "SharePointHOL"
- };
- try {
- //Create the client context
- using(var clientContext = authenticationManager.GetNetworkCredentialAuthenticatedContext(authArray[0], authArray[1], authArray[2], authArray[3])) {
- //Get the web object from client context and create the Content Type
- clientContext.Web.CreateContentType("Employee CT", "0x0100A33D9AD9805788419BDAAC2CCB37509F", "Custom CT");
- Console.WriteLine("The Content Type has been created.");
- Console.ReadLine();
- }
- } catch (Exception ex) {
- Console.WriteLine("Exception : " + ex.Message);
- }
Now, let’s see how to associate the created CT with a list.
- Create instance of the authenticationManager which will be used to create the Client Context.
- //Get instance of Authentication Manager
- OfficeDevPnP.Core.AuthenticationManager authenticationManager = new OfficeDevPnP.Core.AuthenticationManager();
- //Create authentication array for site url,User Name,Password and Domain
- string[] authArray = { "http://sharepoint2016/sites/HOL", "Priyaranjan","password-1","SharePointHOL" };
- Create Client Context by passing the authentication details to the authenticationManager object.
- var clientContext = authenticationManager.GetNetworkCredentialAuthenticatedContext(authArray[0], authArray[1],authArray[2], authArray[3])
- Associate the new Content Type to List.
- clientContext.Web.AddContentTypeToListById("CT List", "0x0100A33D9AD9805788419BDAAC2CCB37509F",true,true);
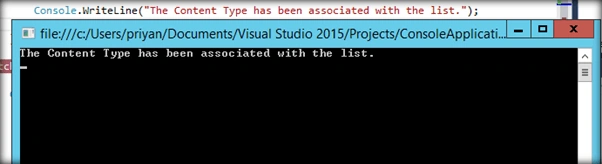
Output
The Content Type has now been associated with the list.
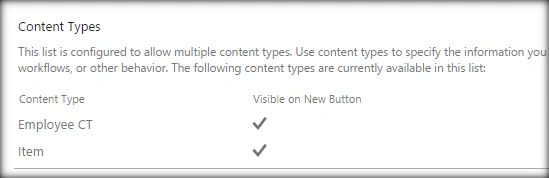
Checking the list settings will show the newly associated Content Type.
Full Code
The full code for associating the Content Type to the list is, as shown below.
- //Get instance of Authentication Manager
- OfficeDevPnP.Core.AuthenticationManager authenticationManager = new OfficeDevPnP.Core.AuthenticationManager();
- //Create authentication array for site url,User Name,Password and Domain
- string[] authArray = {
- "http://sharepoint2016/sites/HOL",
- "Priyaranjan",
- "password-1",
- "SharePointHOL"
- };
- try {
- //Create the client context
- using(var clientContext = authenticationManager.GetNetworkCredentialAuthenticatedContext(authArray[0], authArray[1], authArray[2], authArray[3])) {
- //Create the Content Type by specifying the List Title and Content Type ID
- clientContext.Web.AddContentTypeToListById("CT List", "0x0100A33D9AD9805788419BDAAC2CCB37509F", true, true);
- Console.WriteLine("The Content Type has been associated with the list.");
- Console.ReadLine();
- }
- } catch (Exception ex) {
- Console.WriteLine("Exception : " + ex.Message);
- }
Now, let’s see how to set default Content Type for a list.
- Create instance of the authenticationManager which will be used to create the Client Context.
- //Get instance of Authentication Manager
- OfficeDevPnP.Core.AuthenticationManager authenticationManager = new OfficeDevPnP.Core.AuthenticationManager();
- //Create authentication array for site url,User Name,Password and Domain
- string[] authArray = { "http://sharepoint2016/sites/HOL", "Priyaranjan","password-1","SharePointHOL" };
- Create Client Context by passing the authentication details to the authenticationManager object.
- var clientContext = authenticationManager.GetNetworkCredentialAuthenticatedContext(authArray[0], authArray[1],authArray[2], authArray[3])
- Set the default Content Type for the list using the PnP extension method ‘SetDefaultContentTypeToList’.
- clientContext.Web.SetDefaultContentTypeToList("CT List", "0x0100A33D9AD9805788419BDAAC2CCB37509F");
Output
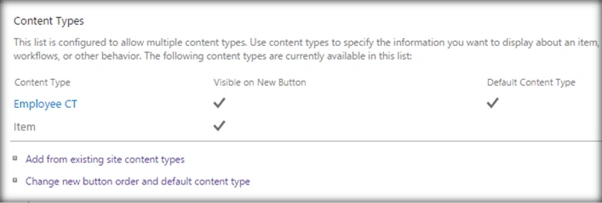
The newly created Content Type has been set as the default Content Type in the list.

The default CT can be seen from the list settings.
Full Code
The full code to set the Content Type as the default list Content Type is, as shown below.
- //Get instance of Authentication Manager
- OfficeDevPnP.Core.AuthenticationManager authenticationManager = new OfficeDevPnP.Core.AuthenticationManager();
- //Create authentication array for site url,User Name,Password and Domain
- string[] authArray = {
- "http://sharepoint2016/sites/HOL",
- "Priyaranjan",
- "password-1",
- "SharePointHOL"
- };
- try {
- //Create the client context
- using(var clientContext = authenticationManager.GetNetworkCredentialAuthenticatedContext(authArray[0], authArray[1], authArray[2], authArray[3])) {
- //Create the Content Type by specifying the List Title and Content Type ID
- clientContext.Web.SetDefaultContentTypeToList("CT List", "0x0100A33D9AD9805788419BDAAC2CCB37509F");
- Console.WriteLine("The Content Type has been set as the default Content Type in the list.");
- Console.ReadLine();
- }
- } catch (Exception ex) {
- Console.WriteLine("Exception : " + ex.Message);
- }
Now, let’s see how to remove the created Content Type from the list,
- Create instance of the authentication manager which will be used to create the Client Context.
- //Get instance of Authentication Manager
- OfficeDevPnP.Core.AuthenticationManager authenticationManager = new OfficeDevPnP.Core.AuthenticationManager();
- //Create authentication array for site url,User Name,Password and Domain
- string[] authArray = { "http://sharepoint2016/sites/HOL", "Priyaranjan","password-1","SharePointHOL" };
- Create Client Context by passing the authentication details to the authenticationManager object.
- var clientContext = authenticationManager.GetNetworkCredentialAuthenticatedContext(authArray[0], authArray[1],authArray[2], authArray[3])
- Remove the Content Type from the list using the PnP extension method ‘RemoveContentTypeFromListByName’ or ‘RemoveContentTypeFromListById’.
- clientContext.Web.RemoveContentTypeFromListById("CT List", "0x0100A33D9AD9805788419BDAAC2CCB37509F");
- // We can also use the below method to remove CT by Name - List Title and CT Name are the parameters
- //clientContext.Web.RemoveContentTypeFromListByName("CT List", "Employee");
Output
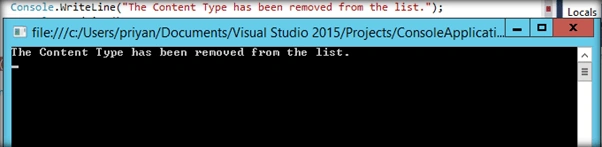
The Content Type has now been removed from the list.
Full Code
The full code to remove the Content Type from the list is, as shown below.
- //Get instance of Authentication Manager
- OfficeDevPnP.Core.AuthenticationManager authenticationManager = new OfficeDevPnP.Core.AuthenticationManager();
- //Create authentication array for site url,User Name,Password and Domain
- string[] authArray = {
- "http://sharepoint2016/sites/HOL",
- "Priyaranjan",
- "password-1",
- "SharePointHOL"
- };
- try {
- //Create the client context
- using(var clientContext = authenticationManager.GetNetworkCredentialAuthenticatedContext(authArray[0], authArray[1], authArray[2], authArray[3])) {
- //Remove the Content Type by specifying the List Title and Content Type ID
- clientContext.Web.RemoveContentTypeFromListById("CT List", "0x0100A33D9AD9805788419BDAAC2CCB37509F");
- // We can also use the below method to remove CT by Name - List Title and CT Name are the parameters
- //clientContext.Web.RemoveContentTypeFromListByName("CT List", "Employee");
- Console.WriteLine("The Content Type has been removed from the list.");
- Console.ReadLine();
- }
- } catch (Exception ex) {
- Console.WriteLine("Exception : " + ex.Message);
- }
Thus, we saw how to work with Content Types in SharePoint 2016, using PnP Core Component CSOM library.
Madhan ThuraiPosted Jul 24, 2019, 7:27 AM
Here How to generate Id and how to provide parent content type
Tarun DPosted Sep 20, 2016, 6:40 AM
Thanks for sharing..