
Introduction
In this article I am going to describe how to validate the checkbox using jQuery. Checkbox validation is usually more difficult due to its nature of having multiple values at the same time.
To validate a checkbox Consider a simple form where a user is required to select at least one checkbox. Let's see the steps to create this type control using jQuery.
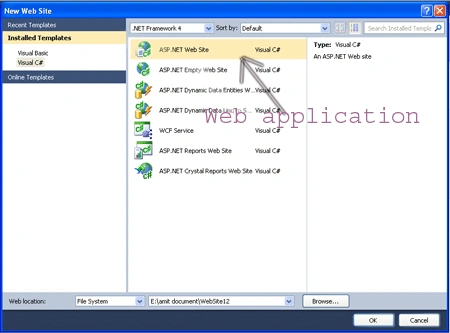
Step 1 : Firstly we have to create a web Application.
- Go to Visual Studio 2010.
- Create the web Application.
- Give a suitable name to the web Application.
- Click OK.
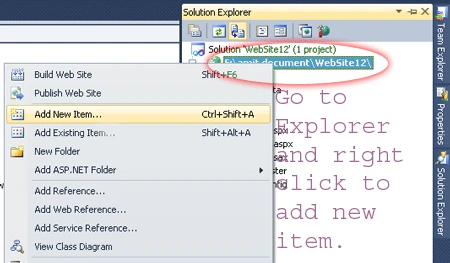
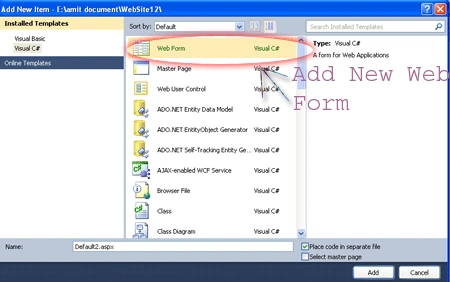
Step 2 : Secondly you have to add a new page to the website.
- Go to the Solution Explorer.
- Right Click on Project name.
- Select add new item.
- Add a new web page and give it a name here "Akshay"
- Click OK.
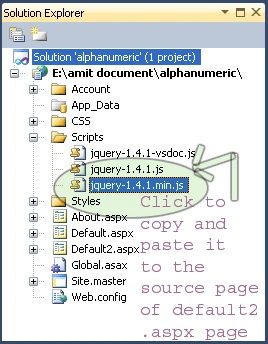
Step 3 : In this step we are going to see that see from where the js reference will be added to the source page of the Akshay.aspx page.
Step 4 : Now we are going to write the script code which will be inside either on the head section or in the body section it will depend upon you which way you like most to placed it.

Step 5 : In this step we are going
to write the jQuery code which is given below.
<script
type="text/javascript">
$(function () {
$('input[id$=btnSubmit]').click(function
(e) {
var checked = $(':checkbox:checked').length;
if (checked == 0) {
alert('Atleast One hobby Should
Be Selected');
e.preventDefault();
}
else {
alert('Postback occured');
}
});
});
</script>
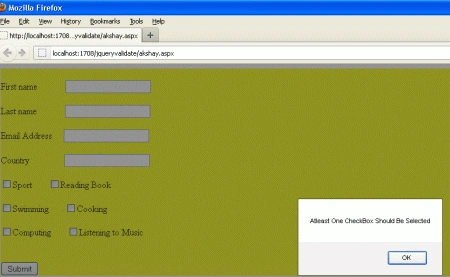
This code is straightforward. When the button is clicked, we first count the checkboxes that are checked using $(':checkbox:checked').length . If the length is 0 (zero), we alert the user and prevent the user from submitting the form using e.preventDefault().
Step 6 : In this step you will see
the body code of the Akshay.aspx page which is given below.
<body>
<form
id="form1"
runat="server"
style="background-color:
#FFFF00">
<br
/>
First name
<asp:TextBox
ID="TextBox1"
runat="server"></asp:TextBox>
<br
/>
<br
/>
Last name
<asp:TextBox
ID="TextBox2"
runat="server"></asp:TextBox>
<br
/>
<br
/>
Email Address
<asp:TextBox
ID="TextBox3"
runat="server"></asp:TextBox>
<br
/>
<br
/>
Country
<asp:TextBox
ID="TextBox4"
runat="server"></asp:TextBox>
<br
/>
<br
/>
<asp:CheckBox
ID="CheckBox1"
Text="Sport"
runat="server"
/>
<asp:CheckBox
ID="CheckBox2"
Text="Reading Book"
runat="server"
/>
<br
/>
<br
/>
<asp:CheckBox
ID="CheckBox3"
Text="Swimming"
runat="server"
/>
<asp:CheckBox
ID="CheckBox4"
Text="Cooking"
runat="server"
/>
<br
/>
<br
/>
<asp:CheckBox
ID="CheckBox5"
Text="Computing"
runat="server"
/>
<asp:CheckBox
ID="CheckBox6"
Text="Listening to
Music" runat="server"
/>
<br
/>
<br
/>
<br
/>
<asp:Button
ID="btnSubmit"
runat="server"
Text="Submit"
ToolTip="Select atleast
one hobby before clicking" />
<div>
</div>
</form>
</body>
Step 7 : In this step we will write the Complete code for the Akshay.aspx page which is given below.
Code


Step : The design of akshay.aspx is.
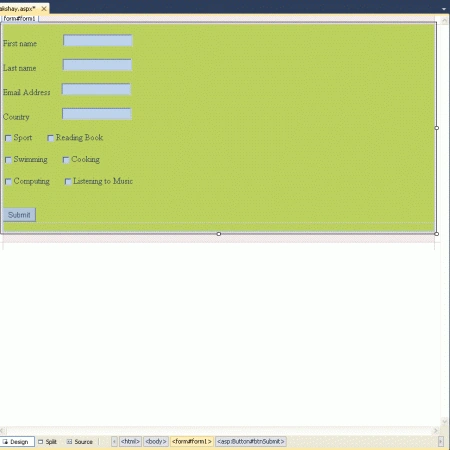
Step 8 : Now we are going to run the application by pressing F5 and the related output is given below.
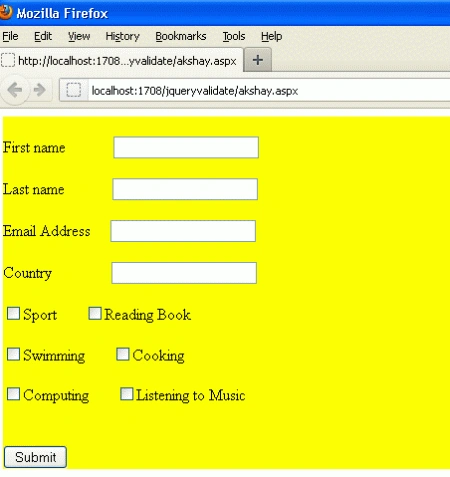
Click on Submit Button.
Resources
Join the conversation! Your thoughts help the community grow.