

In this article, we will learn the basics of the checkbox in the React.js application.
Prerequisites of React
- Familiarity with HTML and JavaScript.
- node.js installed
Create React Project
To create a React app, use the following command in the terminal.
npx create-react-app matui
Install Bootstrap
Now install Bootstrap by using the following command.
npm install bootstrap
Now, open the index.js file and add the import Bootstrap.
import 'bootstrap/dist/css/bootstrap.min.css';
Now right-click on the src folder, create a new component named 'checkboxdemo.js', and follow the code.
import React from "react";
const Checkboxdemo = () => {
    const [allchecked, setAllChecked] = React.useState([]);
    function handleChange(e) {
        if (e.target.checked) {
            setAllChecked([...allchecked, e.target.value]);
        } else {
            setAllChecked(allchecked.filter((item) => item !== e.target.value));
        }
    }
    return (
        <div>
            <div class="col-sm-12 btn btn-info"> How to Use CheckBox in React</div>
            <div>
                <input value="One" type="checkbox" onChange={handleChange} />
                <span> Delhi </span>
            </div>
            <div>
                <input value="Two" type="checkbox" onChange={handleChange} />
                <span> Mumbai </span>
            </div>
            <div>
                <input value="Three" type="checkbox" onChange={handleChange} />
                <span> Jaipur </span>
            </div>
            <div>Checked values  {allchecked.join(" , ")}</div>
        </div>
    );
};
export default Checkboxdemo;
Now, import the checkboxdemo component in the src/App.js file.
import './App.css';
import Checkboxdemo from './checkboxdemo'
function App() {
  return (
    <div className="App">
      <Checkboxdemo/>
    </div>
  );
}

export default App;
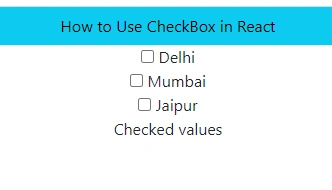
Now, run the project using the 'npm start' command and check the result.
Summary
In this article, we learned the basics of checkboxes in the React.js application.
Join the conversation! Your thoughts help the community grow.