

Introduction
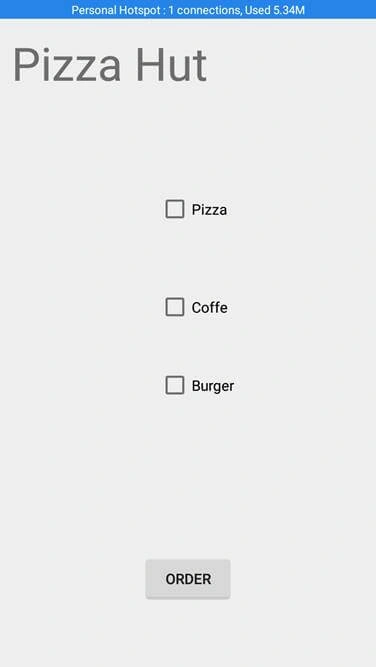
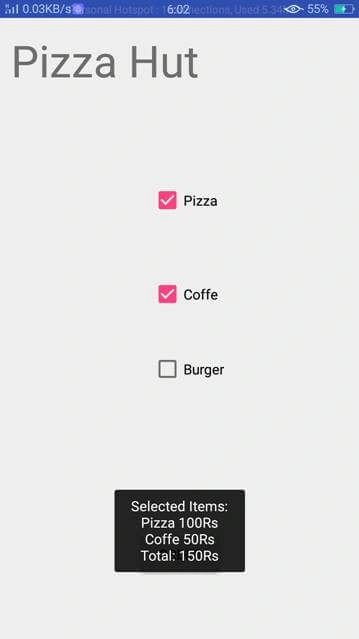
In this article, I will show you how to create an Android app using Android Studio that uses Checkbox. Android Checkbox is a type of two state button - either checked or unchecked. There can be a lot of uses for checkboxes. For example, it can be used to learn the hobby of the user or to activate/deactivate the specific action, etc.
Requirements
- Android Studio version 2.3.3
- A bit of XML and JAVA knowledge.
- Android Emulator (or) Android mobile
- Download link (Android Studio)
Steps to be followed
Follow these steps to create the aforementioned app. I have included the source code in the attachment.
Step 1
Open Android Studio and start a new Android Studio Project.
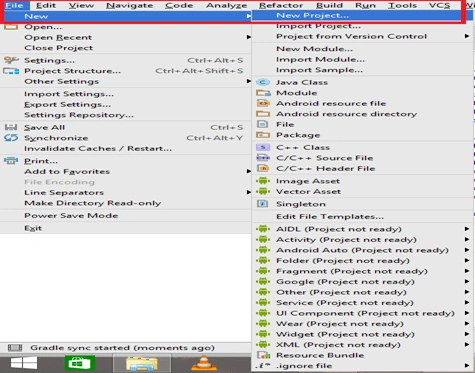
Step 2
You can choose your application name and choose where your project is stored. If you wish to use C++ for coding the project, mark the "Include C++ support", and click the "Next" button.
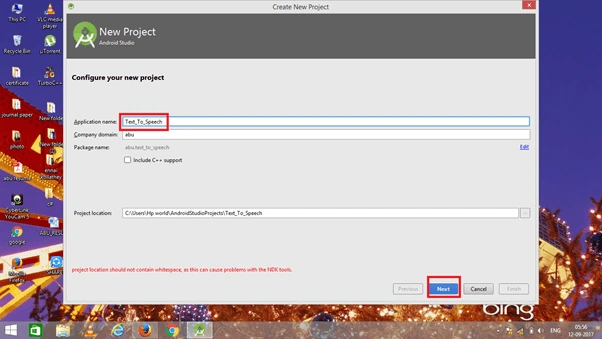
Step 3
Now, select the version of Android and select the target Android devices. We need to choose the SDK level which plays an important role in running the application.
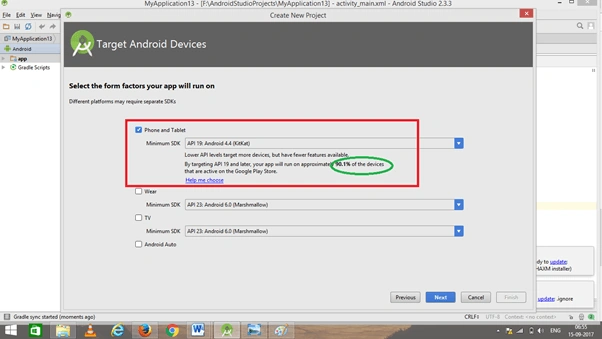
Step 4
Now, add the activity and click the "Next" button.
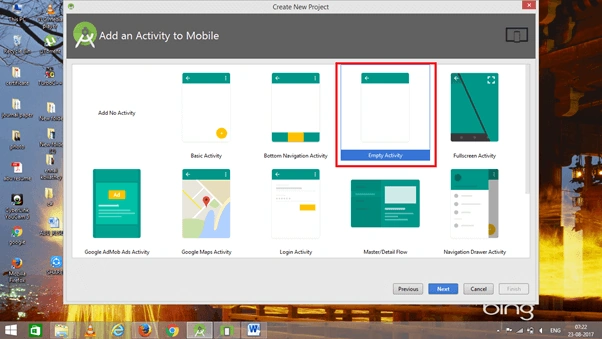
Step 5
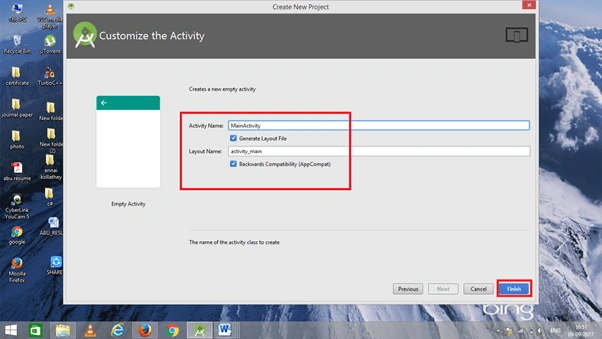
Add Activity name and click "Finish".
Step 6
Go to activity_main.xml. This XML file contains the designing code for your Android app.
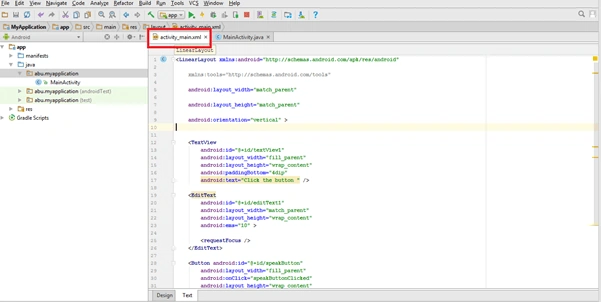
The XML code is given below.
- <RelativeLayout xmlns:android="http://schemas.android.com/apk/res/android"
- xmlns:tools="http://schemas.android.com/tools"
- android:layout_width="match_parent"
- android:layout_height="match_parent"
- tools:context=".MainActivity" >
- <TextView
- android:id="@+id/textView1"
- android:layout_width="wrap_content"
- android:layout_height="wrap_content"
- android:text=" Pizza Hut"
- android:textSize="44dp"
- android:layout_alignParentTop="true"
- android:layout_alignParentStart="true"
- android:layout_marginTop="13dp" />
- <CheckBox
- android:id="@+id/checkBox1"
- android:layout_width="wrap_content"
- android:layout_height="wrap_content"
- android:text="Pizza"
- android:layout_below="@+id/textView1"
- android:layout_alignStart="@+id/checkBox2"
- android:layout_marginTop="95dp" />
- <CheckBox
- android:id="@+id/checkBox2"
- android:layout_width="wrap_content"
- android:layout_height="wrap_content"
- android:text="Coffe"
- android:layout_marginTop="62dp"
- android:layout_below="@+id/checkBox1"
- android:layout_alignStart="@+id/checkBox3" />
- <CheckBox
- android:id="@+id/checkBox3"
- android:layout_width="wrap_content"
- android:layout_height="wrap_content"
- android:text="Burger"
- android:layout_below="@+id/checkBox2"
- android:layout_alignEnd="@+id/button1"
- android:layout_marginTop="43dp" />
- <Button
- android:id="@+id/button1"
- android:layout_width="wrap_content"
- android:layout_height="wrap_content"
- android:text="Order"
- android:layout_marginBottom="61dp"
- android:layout_alignParentBottom="true"
- android:layout_centerHorizontal="true" />
- </RelativeLayout>
Step 7
Go to Main Activity.java. This Java program is the backend language for Android apps.
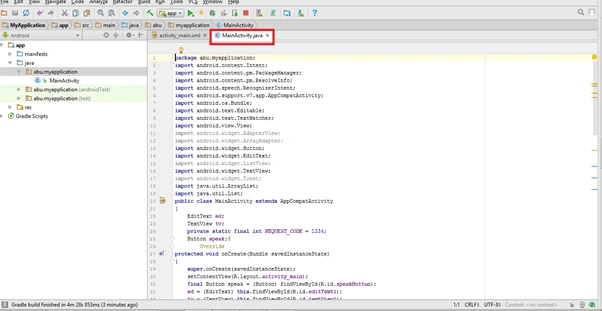 The java code is given below.
- package abu.checkbox;
- import android.os.Bundle;
- import android.app.Activity;
- import android.view.Menu;
- import android.view.View;
- import android.view.View.OnClickListener;
- import android.widget.*;
- public class MainActivity extends Activity {
- CheckBox pizza,coffe,burger;
- Button buttonOrder;
- @Override
- protected void onCreate(Bundle savedInstanceState) {
- super.onCreate(savedInstanceState);
- setContentView(R.layout.activity_main);
- addListenerOnButtonClick();
- }
- public void addListenerOnButtonClick(){
- pizza=(CheckBox)findViewById(R.id.checkBox1);
- coffe=(CheckBox)findViewById(R.id.checkBox2);
- burger=(CheckBox)findViewById(R.id.checkBox3);
- buttonOrder=(Button)findViewById(R.id.button1);
- buttonOrder.setOnClickListener(new OnClickListener(){
- @Override
- public void onClick(View view) {
- int totalamount=0;
- StringBuilder result=new StringBuilder();
- result.append("Selected Items:");
- if(pizza.isChecked()){
- result.append("\nPizza 100Rs");
- totalamount+=100;
- }
- if(coffe.isChecked()){
- result.append("\nCoffe 50Rs");
- totalamount+=50;
- }
- if(burger.isChecked()){
- result.append("\nBurger 120Rs");
- totalamount+=120;
- }
- result.append("\nTotal: "+totalamount+"Rs");
- Toast.makeText(getApplicationContext(), result.toString(), Toast.LENGTH_LONG).show();
- }
- });
- }
- @Override
- public boolean onCreateOptionsMenu(Menu menu) {.
- getMenuInflater().inflate(R.menu.activity_main, menu);
- return true;
- }
- }
Step 8
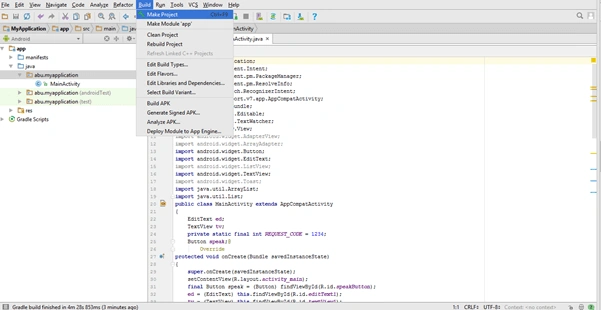
Now, go to the menu bar and click "Make Project" or press ctrl+f9 to debug the error.
 Step 9
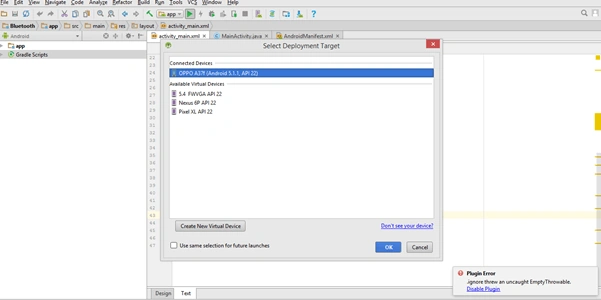
Then, click the "Run" button or press shift+f10 To run the project. And choose the virtual machine and click OK.
Conclusion
We have successfully created a Checkbox Android application using Android Studio.
Join the conversation! Your thoughts help the community grow.