
Follow the below steps.
Step #1 Software installations required
- Download and install Java from Oracle (http://www.oracle.com/technetwork/java/javase/downloads/index.html).
- Download Apache Maven version 3.0.4 from Maven website (https://maven.apache.org/download.cgi)
- Download and install Tortoise git from Git Home Page (https://tortoisegit.org/download/)
- Download the Jenkins War file from Jenkins Homepage (https://jenkins.io/index.html)
Step #2 Starting Jenkins
- Start Jenkins directly via the command line using the following command.
- Java -Dhudson.model.DirectoryBrowserSupport.CSP= -jar Jenkins. War
- (Intentionally we are providing no values for Dhudson.model.DirectoryBrowserSupportby assigning a blank. This is required to get test reports with screenshots and pie charts. Don’t delete the space after CSP=)
- Open the browser with the URL: http://localhost:8080
Step #3 Configuring software on Jenkins
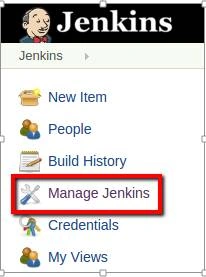
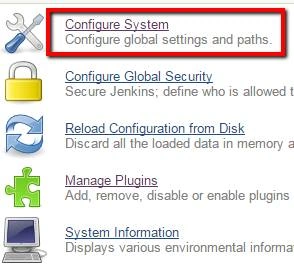
Select "Manage Jenkins" and afterward, configure the system.
- Configuring JDK
- Go to Jenkins and navigate to Manage Jenkins -> Configure System.
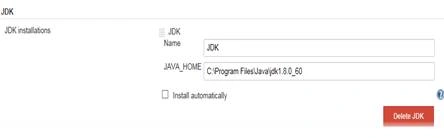
- Click "JDK installations".
- Add "JDK".
- Uncheck "Install automatically" (do this if JDK is available in your system or else check "Install automatically" and ignore the below steps).
- Provide JDK name (available from the drop-down list).
- Provide JDK home directory path.
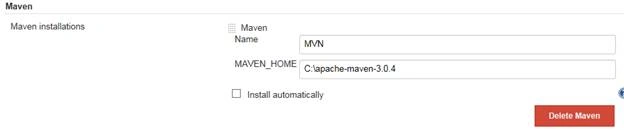
- Configuring maven
- Go to Jenkins and navigate to Manage Jenkins -> Configure System.
- Click Maven installations.
- Add Maven.
- Uncheck Install automatically (do this if Maven is available in your system or else, check "Install automatically" and ignore the below steps).
- Provide Maven name.
- Provide Maven home directory path.
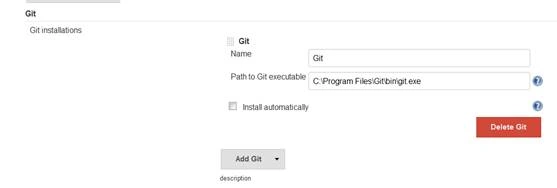
- Configuring Git
- Go to Jenkins and navigate to Manage Jenkins -> Configure System.
- Click Git installations.
- Add Git.
- Uncheck "Install automatically" (do this if GIT is available in your system or else, check "Install automatically" and ignore the below steps).
- Provide Git name.
- Provide Git home directory path.
Step #4 Install Plugins required
- Go to Manage Jenkins -> Manage Plugins.
- Go to the Available tab.
- Search using a filter for Git Plugin, HTML Publisher Plugin.
- Check the box besides the plugins displayed after the search.
- Click on "Download now and install after restart" button.

- Restart Jenkins.
Step #5 Creating new Job for running Serenity tests
- Click on "New Item" from the homepage.
- Enter the Job Name, and select Maven project.
- Click OK button.

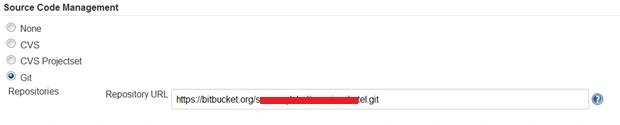
- Under the "Source Code Management" section, select Git and provide GIT URL. For instance -
https://bitbucket.org/xxx/xxx.git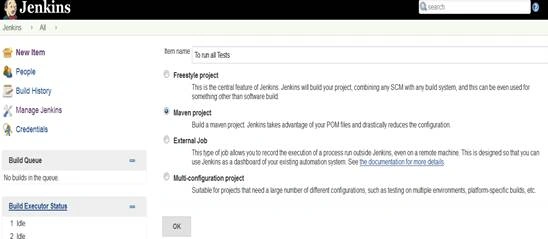
- Click "Add" button and provide your username and password to access the Git Repository.
- Under "Build" section, provide Root POM, Goals, and options.
This is to specify which test to run.
Ex - If HomeStoryTest has to be run, we should provide as below using –Dit.test switch.
If all tests have to run, give as ‘clean verify’ (without any switch).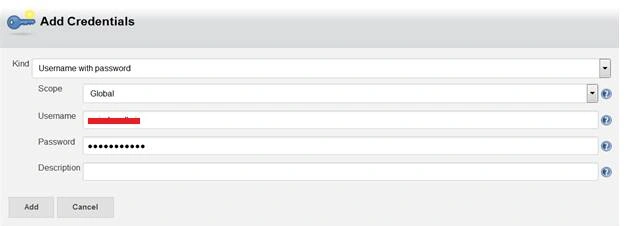
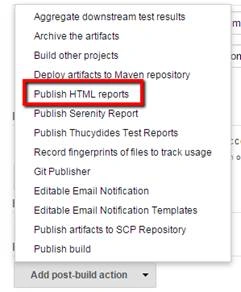
- Under "Post-build Actions" section, select Publish HTML reportsfrom ‘Add post-build action’ dropdown.

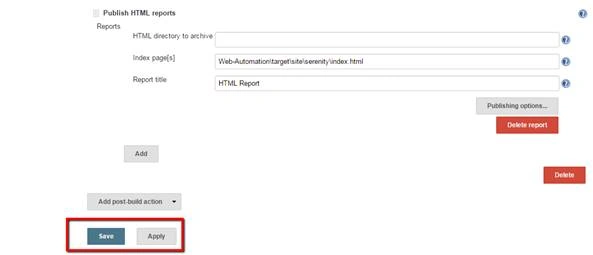
- Provide Index page path as below.
- Click on "Apply and Save" button.
Step #6 Running a Test
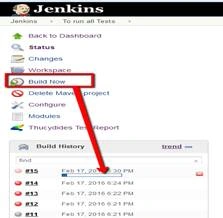
From the Story page, click on "Build Now".
Step #7 View the Test Results
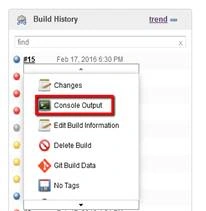
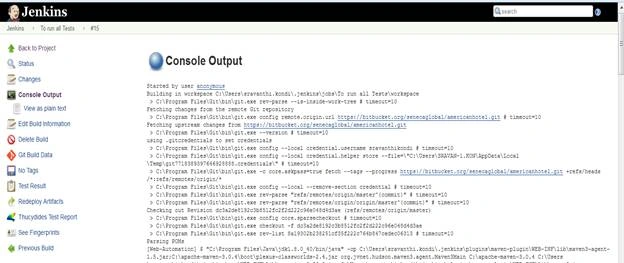
- We can view the console output while the test is running from the "Build Progress" section. Click on dropdown to go to the console output.
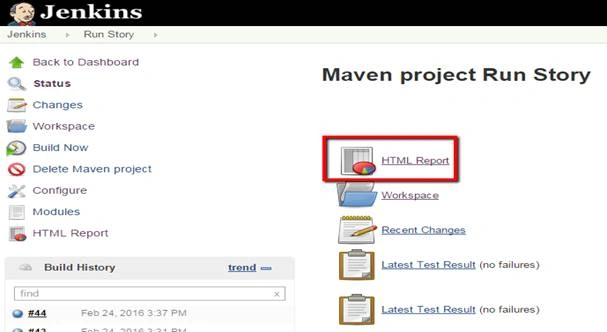
- Access HTML Reports from the "Job Dashboard" page.
- Serenity Reports will be displayed as below.
Tridip BhattacharjeePosted Nov 21, 2017, 4:04 AM
Nice article. i like to have one article from your side on jenkins. just show how to configure jenkins as continuous integration with TFS and VSTS. so when i will check my code from VS IDE2013 then a build will be created by jenkins in server. looking for your help. thanks