

Introduction
In this article, we are going to discuss the basics of auth guards and step-by-step implementation with the help of different use cases.
Agenda
- What is Angular?
- Auth Guards in Angular
- Types of Auth Guards in Angular
- Benefits of Auth Guards
- Examples of Auth Guards
Prerequisites
- VS Code
- Angular CLI
- NodeJS
- Basic understanding of TypeScript and Angular
What is Angular?
Angular is a popular open-source JavaScript framework for building web applications. It was developed by Google and is currently maintained by the Angular Team at Google. Angular allows developers to create dynamic, single-page applications (SPAs) and provides a structured approach to building complex web applications.
Auth Guards in Angular
- In Angular, Auth Guards is a technique used to protect our routes based on user authentication status.
- It will manage different access levels between authenticated and non-authenticated users.
- When a user is navigating to a specific route in the application, the Auth Guard can check whether the user is authenticated and authorized to access that particular route.
- If the user is authenticated, the Auth Guard allows the navigation to proceed further. Otherwise, it will redirect the user to a login page or another appropriate route, preventing access to the protected content.
Types of Auth Guards in Angular
In Angular, there are different types of Auth Guards that you can use to protect routes based on the user’s authentication status.
1. CanActivate
- CanActivate is the common type of Auth Guard used in Angular applications, which we mostly used.
- It determines if a user is allowed to navigate a particular route and returns a Boolean value (true or false) or an observable/promise that resolves to a Boolean.
- If the returned value is true, the route is activated; if it’s false, the route is blocked, and the user is typically redirected to a login page or an appropriate route.
2. CanActivateChild
- CanActivateChild Auth Guard is similar to CanActivate, but it is specifically used to protect child routes of a particular route.
- It is used when you have nested routes and need to protect all the child routes based on the same authentication criteria as per our requirements.
3. CanDeactivate
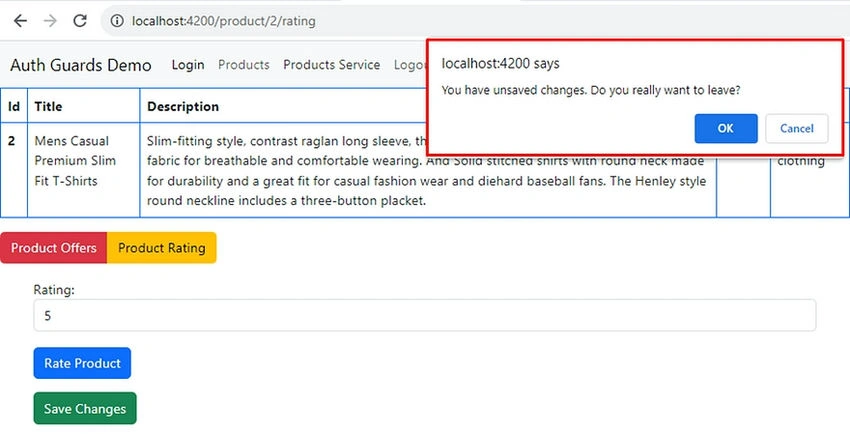
- The CanDeactivate is another type of guard in Angular that allows us to control whether a user is allowed to leave a particular route, like if we have any unsaved changes.
- It is used to prompt the user for confirmation when navigating away from a route that may have unsaved changes or to perform other checks before allowing the user to leave.
4. CanLoad
- CanLoad Auth Guard is used when you want to prevent the lazy-loaded modules from being loaded for users who are not authenticated.
- It checks if the user can load the module asynchronously or not.
Benefits of Auth Guards
Auth Guards in Angular provide the following important benefits for building secure web applications.
- Flexibility: Auth Guards are highly customizable. Whether we need to check user roles, permissions, or other conditions, Auth Guards can be adapted to meet your needs.
- Maintenance and Testing: By separating authentication and authorization logic into Auth Guards, it becomes easier to maintain and test this functionality independently.
- Route Protection: Auth Guards allow you to protect specific routes or features in your application, ensuring that only authorized users can access certain pages or perform specific actions.
- User Experience: Auth Guards can be used to handle scenarios where a user is not authenticated. Instead of denying access to a page, we can redirect the user to a login page or another appropriate route, providing a more user-friendly experience.
- Security Enhancement: By controlling access to routes and features, Auth Guards help secure the application. They play a crucial role in preventing unauthorized access, protecting against potential attacks, and safeguarding sensitive data.
- Code Reusability: Auth Guards are implemented as Angular services, making them reusable throughout the application. Once we define an Auth Guard, we can easily apply it to multiple routes, promoting cleaner and more maintainable code.
- Lazy Loading with Protection: With Auth Guards, we can control the loading of lazy-loaded modules based on the user’s authentication status. This means we can prevent loading certain modules for unauthenticated users, improving the application’s performance and reducing unnecessary data transfer.
- Consistency in Authorization: Auth Guards provide a centralized way to handle user authorization logic. This consistency ensures that authorization checks are consistently applied across the application, reducing the chances of accidentally granting access to unauthorized users.
Example of Auth Guards
Step 1. Create a new Angular application.
ng new angular-guards
Step 2. Install the bootstrap module with the help of the following command.
npm install bootstrap
configure bootstrap in an Angular JSON file.
"styles": [
"src/styles.css",
"./node_modules/bootstrap/dist/css/bootstrap.min.css"
],
"scripts": [
"./node_modules/bootstrap/dist/js/bootstrap.min.js"
]
Step 3. Add the following components to the newly created application.
ng generate component components/login
ng generate component components/product-list
ng generate component components/product-details
ng generate component components/product-offers
ng generate component components/product-ratings
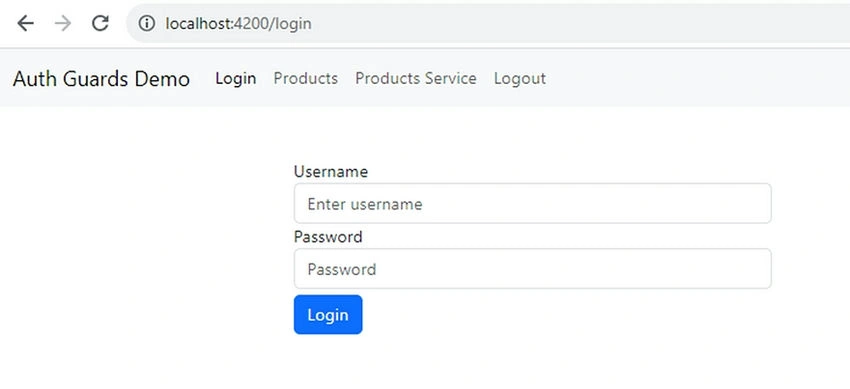
login.component.html
<div class="container">
    <div class="row justify-content-center mt-5">
      <div class="col-md-6">
        <form [formGroup]="loginForm" (ngSubmit)="onSubmit()">
          <div class="form-group">
            <label for="username">Username</label>
            <input type="text" class="form-control" id="username" formControlName="username" placeholder="Enter username">
          </div>
          <div class="form-group">
            <label for="password">Password</label>
            <input type="password" class="form-control" id="password" formControlName="password" placeholder="Password">
          </div>
          <button type="submit" class="btn btn-primary" style="margin-top: 6px;">Login</button>
        </form>
      </div>
    </div>
  </div>
login.component.ts
import { Component } from '@angular/core';
import { FormBuilder, FormGroup, Validators } from '@angular/forms';
import { Router } from '@angular/router';
import { AuthService } from 'src/app/services/auth.service';

@Component({
  selector: 'app-login',
  templateUrl: './login.component.html',
  styleUrls: ['./login.component.css']
})
export class LoginComponent {
  loginForm?: any;

  constructor(private fb: FormBuilder, private authService : AuthService, private router: Router) {}

  ngOnInit(): void {
    this.loginForm = this.fb.group({
      username: ['', Validators.required],
      password: ['', Validators.required]
    });
  }

  onSubmit(): void {
    if (this.loginForm.valid) {
      const username = this.loginForm.get('username').value;
      const password = this.loginForm.get('password').value;

       // Call the authentication service's login method
       if (this.authService.login(username, password)) {
        // Navigate to the ProductListComponent upon successful login
        this.router.navigate(['/product-list']);
      } else {
        // Handle authentication error (show error message, etc.)
      }

    }
  }
}
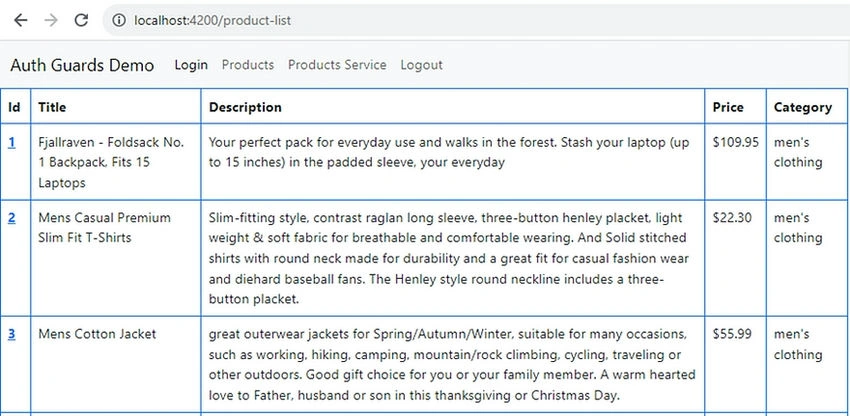
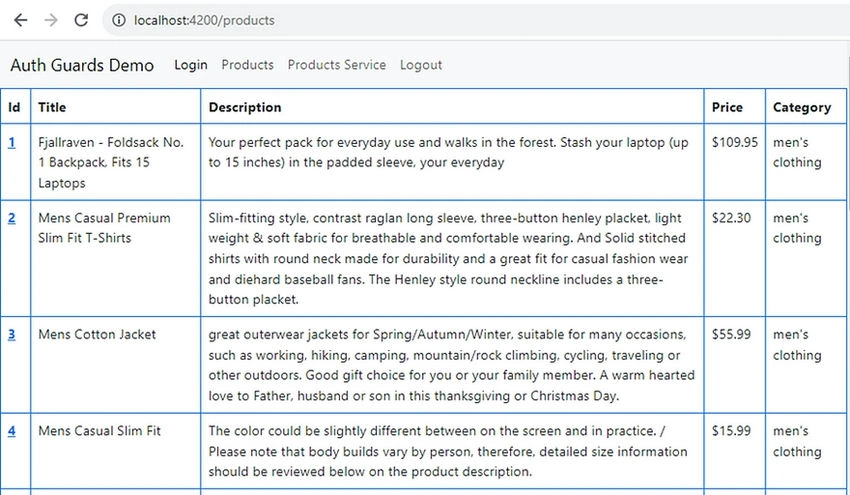
product-list.component.html
<table class="table table-bordered border-primary">
    <thead *ngIf="productData != null">
      <tr>
        <th scope="col">Id</th>
        <th scope="col">Title</th>
        <th scope="col">Description</th>
        <th scope="col">Price</th>
        <th scope="col">Category</th>
      </tr>
    </thead>
    <tbody>
      <tr *ngFor="let product of productData">
        <th scope="row"><a [routerLink]="['/product', product.id]">{{product.id}}</a></th>
        <td>{{product.title}}</td>
        <td>{{product.description}}</td>
        <td>{{product.price | currency}}</td>
        <td>{{product.category}}</td>
      </tr>
    </tbody>
  </table>
product-list.component.ts
import { Component } from '@angular/core';
import { ProductService } from 'src/app/services/product.service';

@Component({
  selector: 'app-product-list',
  templateUrl: './product-list.component.html',
  styleUrls: ['./product-list.component.css']
})
export class ProductListComponent {
  constructor(private productService : ProductService){}

  productData : any;

  ngOnInit(): void {
    this.productService.getProducts().subscribe(
      (data: any[]) => {
        this.productData = data;
      },
      (error) => {
        console.error('Error fetching products:', error);
      }
    );
  }
}
proudct-details.component.html
<table class="table table-bordered border-primary">
    <thead *ngIf="productDetail != null">
        <tr>
            <th scope="col">Id</th>
            <th scope="col">Title</th>
            <th scope="col">Description</th>
            <th scope="col">Price</th>
            <th scope="col">Category</th>
        </tr>
    </thead>
    <tbody>
        <tr>
            <th scope="row">{{productDetail?.id}}</th>
            <td>{{productDetail?.title}}</td>
            <td>{{productDetail?.description}}</td>
            <td>{{productDetail?.price | currency}}</td>
            <td>{{productDetail?.category}}</td>
        </tr>
    </tbody>
</table>

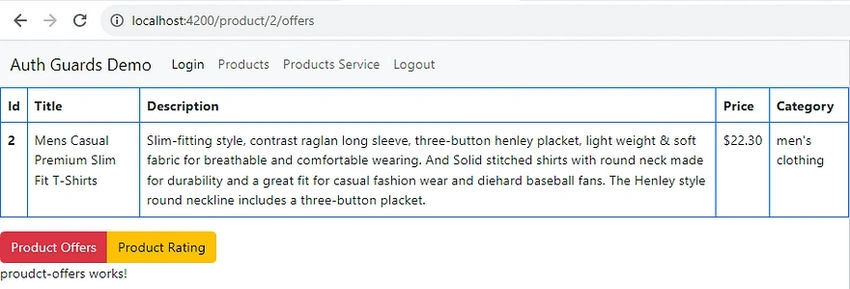
<div class="btn-group" role="group" aria-label="Basic mixed styles example">
    <button type="button" class="btn btn-danger"><a class="nav-link" routerLink="offers">Product Offers</a></button>
    <button type="button" class="btn btn-warning"><a class="nav-link" routerLink="rating">Product Rating</a></button>
</div>

<router-outlet></router-outlet>
proudct-details.component.ts
import { Component } from '@angular/core';
import { ActivatedRoute } from '@angular/router';
import { ProductService } from 'src/app/services/product.service';

@Component({
  selector: 'app-proudct-details',
  templateUrl: './proudct-details.component.html',
  styleUrls: ['./proudct-details.component.css']
})
export class ProudctDetailsComponent {
  productDetail? : any;

  constructor(private route : ActivatedRoute,private productService : ProductService){}

  ngOnInit(): void {
    let productId = this.route.snapshot.params['id'];
    this.getProductDetailById(productId)
  }

  getProductDetailById(id: number){
    this.productService.getProductDetailById(id).subscribe(res => {
      this.productDetail = res
      console.log(res)
    })
  }
}
proudct-offers.component.html
<p>proudct-offers works!</p>
proudct-offers.component.ts
import { Component } from '@angular/core';

@Component({
  selector: 'app-proudct-offers',
  templateUrl: './proudct-offers.component.html',
  styleUrls: ['./proudct-offers.component.css']
})
export class ProudctOffersComponent {

}
proudct-rating.component.html
<div class="product-rating container">
  <form (ngSubmit)="rateProduct()" #ratingForm="ngForm" class="mb-3" style="margin-top: 2%;">
    <div class="form-group">
      <label for="rating">Rating:</label>
      <input type="number" id="rating" name="rating" min="1" max="5" required
             [(ngModel)]="selectedRating" class="form-control">
    </div>

    <button type="submit" [disabled]="ratingForm.invalid" class="btn btn-primary" style="margin-top: 2%;">Rate Product</button>
  </form>
  <button (click)="saveChanges()" [disabled]="!hasUnsavedChanges()" class="btn btn-success">Save Changes</button>
</div>
proudct-rating.component.ts
import { Component } from '@angular/core';

@Component({
  selector: 'app-proudct-rating',
  templateUrl: './proudct-rating.component.html',
  styleUrls: ['./proudct-rating.component.css']
})
export class ProudctRatingComponent {

  private unsavedChanges = false;
  selectedRating: number | null = null;

  rateProduct() {
    if (this.selectedRating !== null) {
      console.log('Rating:', this.selectedRating);
      this.unsavedChanges = true;
    }
  }

  saveChanges() {
    console.log('Saving changes...');
    this.unsavedChanges = false;
  }

  hasUnsavedChanges(): boolean {
    return this.unsavedChanges;
  }
}
Step 4. Create an auth and product service with the help of the following command.
ng generate service services/product
ng generate service services/auth
product.service.ts
import { HttpClient, HttpHeaders } from '@angular/common/http';
import { Injectable } from '@angular/core';
import { AuthService } from './auth.service';
import { Observable } from 'rxjs';

@Injectable({
  providedIn: 'root'
})
export class ProductService {

  private apiUrl = 'https://fakestoreapi.com';
  private authSecretKey = 'Bearer Token';

  constructor(private http: HttpClient) {}

  private getHeaders(): HttpHeaders {
    const authToken = localStorage.getItem(this.authSecretKey);
    return new HttpHeaders({
      'Content-Type': 'application/json',
      Authorization: `Bearer ${authToken}`
    });
  }

  getProducts() : Observable<any[]>{
    const headers = this.getHeaders();
    return this.http.get<any[]>(`${this.apiUrl}/products`, { headers });
  }

  getProductDetailById(id : number){
    const headers = this.getHeaders();
    return this.http.get(`${this.apiUrl}/products/` + id, { headers })
  }
}
auth.service.ts
import { Injectable } from '@angular/core';

@Injectable({
  providedIn: 'root'
})
export class AuthService {

  private isAuthenticated = false;
  private authSecretKey = 'Bearer Token';

  constructor() {
    this.isAuthenticated = !!localStorage.getItem(this.authSecretKey);
  }

  login(username: string, password: string): boolean {
    if (username === 'Jaydeep Patil' && password === 'Pass@123') {
      const authToken = 'eyJhbGciOiJIUzI1NiIsInR5cCI6IkpXVCJ9.eyJzdWIiOiIxMjM0NTY3ODkwIiwibmFtZSI6IkpheWRlZXAgUGF0aWwiLCJpYXQiOjE1MTYyMzkwMjJ9.yt3EOXf60R62Mef2oFpbFh2ihkP5qZ4fM8bjVnF8YhA'; // Generate or receive the token from your server
      localStorage.setItem(this.authSecretKey, authToken);
      this.isAuthenticated = true;
      return true;
    } else {
      return false;
    }
  }

  isAuthenticatedUser(): boolean {
    return this.isAuthenticated;
  }

  logout(): void {
    localStorage.removeItem(this.authSecretKey);
    this.isAuthenticated = false;
  }
}
Step 5. Next, add one feature module, as shown below, that we used with the CanLoad auth guard.
ng generate module modules/product-service
product-service-routing.module.ts
import { NgModule } from '@angular/core';
import { RouterModule, Routes } from '@angular/router';
import { ProductServiceComponent } from './product-service-component/product-service-component.component';

const routes: Routes = [{ path: '', component: ProductServiceComponent }];

@NgModule({
  imports: [RouterModule.forChild(routes)],
  exports: [RouterModule]
})
export class ProductServiceRoutingModule { }
product-service.module.ts
ng generate component modules/product-service/product-service-component
product-service-component.component.html
<p>product-service-component works!</p>
product-service-component.component.ts
import { Component, OnInit } from '@angular/core';

@Component({
  selector: 'app-product-service-component',
  templateUrl: './product-service-component.component.html',
  styleUrls: ['./product-service-component.component.css']
})
export class ProductServiceComponent implements OnInit {

  constructor(){
    console.log('service component')
  }

  ngOnInit(): void {
    console.log('service component')
  }

}
Step 6. Add the following code related to navbar tabs inside the app component for navigation purposes.
app.component.html
<nav class="navbar navbar-expand-lg navbar-light bg-light">
  <div class="container-fluid">
    <a class="navbar-brand" href="#">Auth Guards Demo</a>
    <button class="navbar-toggler" type="button" data-bs-toggle="collapse" data-bs-target="#navbarSupportedContent" aria-controls="navbarSupportedContent" aria-expanded="false" aria-label="Toggle navigation">
      <span class="navbar-toggler-icon"></span>
    </button>
    <div class="collapse navbar-collapse" id="navbarSupportedContent">
      <ul class="navbar-nav me-auto mb-2 mb-lg-0">
        <li class="nav-item">
          <a class="nav-link active" aria-current="page" routerLink="/login">Login</a>
        </li>
        <li class="nav-item">
          <a class="nav-link" routerLink="/products">Products</a>
        </li>
        <li class="nav-item">
          <a class="nav-link" routerLink="/service">Products Service</a>
        </li>
        <li class="nav-item">
          <a class="nav-link" (click)="logout()">Logout</a>
        </li>
      </ul>
    </div>
  </div>
</nav>

<router-outlet></router-outlet>
app.component.ts
import { Component } from '@angular/core';
import { AuthService } from './services/auth.service';
import { Router } from '@angular/router';

@Component({
  selector: 'app-root',
  templateUrl: './app.component.html',
  styleUrls: ['./app.component.css']
})
export class AppComponent {
  title = 'angular-guards';

  constructor(private authService: AuthService, private router : Router) {}

  logout(): void {
    this.authService.logout();
    this.router.navigate(['/login']);
  }
}
Step 7. Create a new auth guard with the help of the following command and add the code as shown below.
ng generate guard guards/auth
auth.guard.ts
import { Injectable } from '@angular/core';
import { CanActivate, CanActivateChild, CanDeactivate, CanLoad, Router } from '@angular/router';
import { AuthService } from '../services/auth.service';
import { ProudctRatingComponent } from '../components/proudct-rating/proudct-rating.component';

@Injectable({
  providedIn: 'root'
})
export class AuthGuard implements CanActivate, CanActivateChild,CanDeactivate<ProudctRatingComponent>, CanLoad  {
  constructor(private authService: AuthService, private router: Router) {}

  canActivate(): boolean {
    return this.checkAuth();
  }

  canActivateChild(): boolean {
    return this.checkAuth();
  }

  canDeactivate(component: ProudctRatingComponent): boolean {
    if (component.hasUnsavedChanges()) {
      return window.confirm('You have unsaved changes. Do you really want to leave?');
    }
    return true;
  }

  canLoad(): boolean {
    return this.checkAuth();
  }

  private checkAuth(): boolean {
    if (this.authService.isAuthenticatedUser()) {
      return true;
    } else {
      // Redirect to the login page if the user is not authenticated
      this.router.navigate(['/login']);
      return false;
    }
  }

}
Step 8. Next, open the app routing file and configure different routes with auth guards.
app-routing.module.ts
import { NgModule } from '@angular/core';
import { RouterModule, Routes } from '@angular/router';
import { LoginComponent } from './components/login/login.component';
import { ProductListComponent } from './components/product-list/product-list.component';
import { AuthGuard } from './guards/auth.guard';
import { ProudctDetailsComponent } from './components/proudct-details/proudct-details.component';
import { ProudctRatingComponent } from './components/proudct-rating/proudct-rating.component';
import { ProudctOffersComponent } from './components/proudct-offers/proudct-offers.component';

const routes: Routes = [
  {path: '', component:ProductListComponent, pathMatch:'full', canActivate: [AuthGuard]},
  {path: 'login', component:LoginComponent},
  {path: 'products', component:ProductListComponent, canActivate: [AuthGuard]},
  {path: 'products', component:ProductListComponent, canActivate: [AuthGuard]},
  {
    path: 'product/:id', component: ProudctDetailsComponent,canActivateChild: [AuthGuard],
    children: [
      { path: 'rating', component: ProudctRatingComponent, canDeactivate: [AuthGuard] },
      { path: 'offers', component: ProudctOffersComponent }
    ]
  },
  {
    path: 'service',
    loadChildren: () => import('./modules/product-service/product-service.module').then(m => m.ProductServiceModule),
    canLoad: [AuthGuard]
  },
  {path: '**', component:ProductListComponent, pathMatch:'full', canActivate: [AuthGuard]}
];

@NgModule({
  imports: [RouterModule.forRoot(routes)],
  exports: [RouterModule]
})
export class AppRoutingModule { }
Step 9. Configure auth guards and import application-related modules inside the root module, as shown below.
app.module.ts
import { NgModule } from '@angular/core';
import { BrowserModule } from '@angular/platform-browser';

import { AppRoutingModule } from './app-routing.module';
import { AppComponent } from './app.component';
import { LoginComponent } from './components/login/login.component';
import { ProductListComponent } from './components/product-list/product-list.component';

import { HttpClientModule } from '@angular/common/http';
import {ReactiveFormsModule} from '@angular/forms'
import { AuthGuard } from './guards/auth.guard';
import { ProudctDetailsComponent } from './components/proudct-details/proudct-details.component';
import { ProudctRatingComponent } from './components/proudct-rating/proudct-rating.component';
import { ProudctOffersComponent } from './components/proudct-offers/proudct-offers.component';

import {FormsModule} from '@angular/forms'
import { ProductServiceModule } from './modules/product-service/product-service.module';

@NgModule({
  declarations: [
    AppComponent,
    LoginComponent,
    ProductListComponent,
    ProudctDetailsComponent,
    ProudctRatingComponent,
    ProudctOffersComponent
  ],
  imports: [
    BrowserModule,
    AppRoutingModule,
    HttpClientModule,
    ReactiveFormsModule,
    FormsModule,
    ProductServiceModule
  ],
  providers: [AuthGuard],
  bootstrap: [AppComponent]
})
export class AppModule { }
Step 10. Run your application.
ng serve
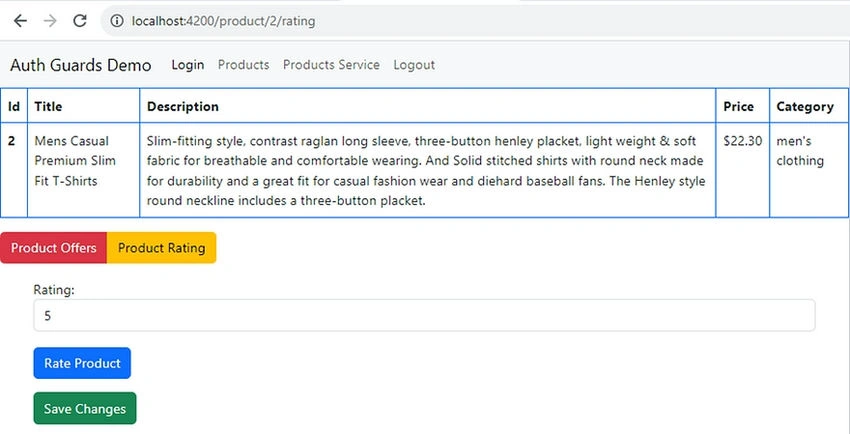
Sample Screenshots
- Username: Jaydeep Patil
- Password: Pass@123
GitHub
Conclusion
In this article, we discussed the basics of auth guards, types of guards, and their benefits with the help of different examples.
Happy Coding!
Raja MsrPosted Aug 22, 2023, 5:43 AM
Thank you for sharing this informative and well-written article. I found the section on using Auth Guards to protect routes in Angular particularly helpful. The examples provided were clear and easy to follow.