
In this article, I will explain how to integrate an ASP.NET MVC project with GitHub. Along with that, I will explain some of the below activities often performed by developers on Git.
- Create Local Branch
- Push Changes
- Pull Request
Prerequisites to achieve this demo are the following -
- Visual Studio 2017
- GitHub access (Create your account on GitHub)
Let us understand the difference between GitHub and Git
GitHub - This is a distributed version control and source code management system where we can store our projects. We call these projects Repositories (Repos) in GitHub terminology. From here, we can download projects as well as it provides a repository URL to clone it from Visual Studio.
Git
An open source version control system that does the following -
- It keeps track of the changes made to the code by developers.
- Version control system keeps these revisions straight, storing modifications in a central repository. This allows developers to easily collaborate as they can download a new version of the software, make changes and upload the newest revision. Every developer can see these new changes, download them, and contribute.
- Git is the preferred version control system of most developers since it has multiple advantages over other systems available. It stores the file system more efficiently and ensures the file integrity.
Let’s dive into the actual concept of how we integrate ASP.NET project with GitHub.
Step 1
First, you have to create your personal account on GitHub. Once you create an account successfully, log in and check it.
Step 2
Switch to Visual Studio, open your project, and go to Team Explorer.
Team Explorer option is available under the View menu in Visual Studio, like below.
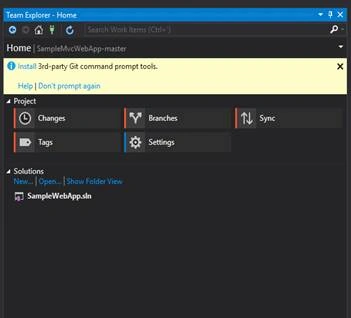
If you don’t find these options under the Team Explorer window, that means Git is not installed on your Visual Studio. So, first, let’s get the Git installed by using Nuget. Just go to the Tools menu and under that select Extension and Updates where you have to type GitHub in the search box like below.
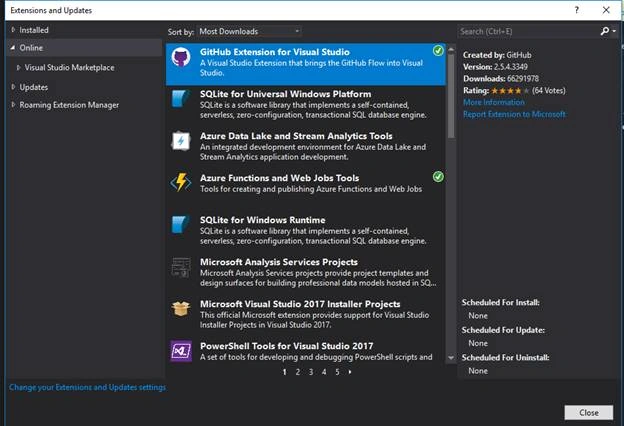
On my machine, it is already installed. Now, the Git is ready in your Visual Studio to perform operations.
Step 3
Open your project in Visual Studio and go to Team Explorer where you’ll find the below screen.
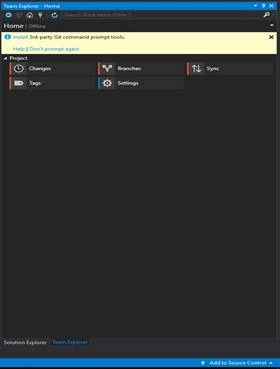
At the bottom of this screen, you can find "Add to Source Control" option. Click on this and it will pop the Git option up. Clicking it, the below options will be displayed.
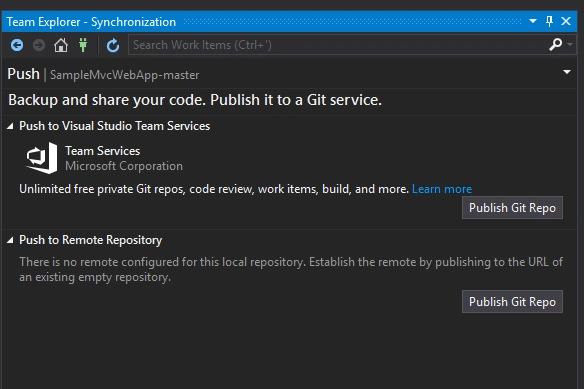
Here, let us go to the second option - "Push to Remote Repository" section. Under this, click on the "Publish Git Repo" button. It will ask you to enter the repo name. I have given here the git URL along with the project name like this - https://github.com/MVCApplication and tried to push the repo but it was denied because first, we have to commit these changes locally.
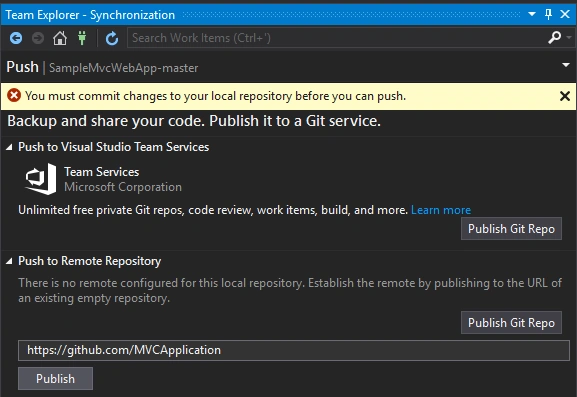
In order to commit these changes locally, we have to go back to options with the help of home button on top of this window. Just click on the home symbol and it will take you to the below screen.
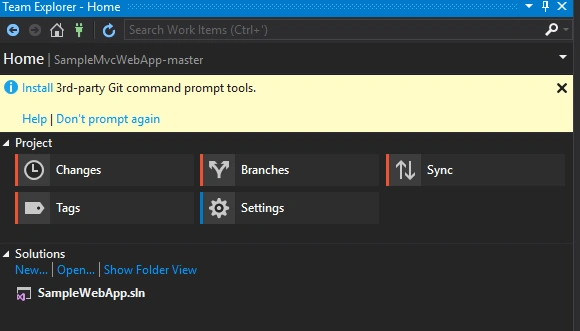
Now, click on the "Changes" tab and commit your changes. By default, Visual Studio creates a master branch on its own and save these files under that branch.
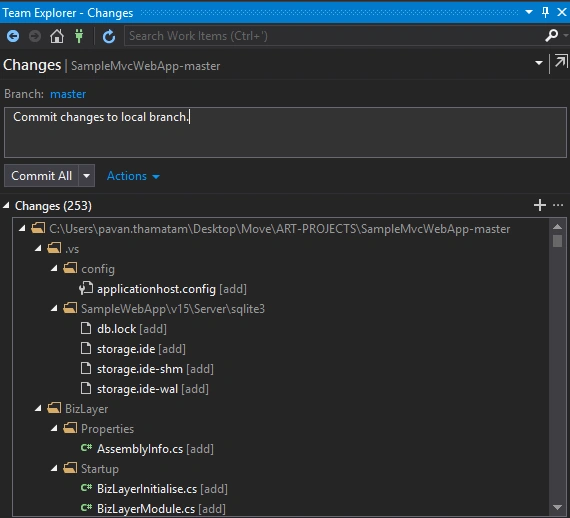
Click on "Commit All" button. Then, it will save all the files under the master branch.
Step 4
Go back to the home again where you will find the Sync option. Just click on it.
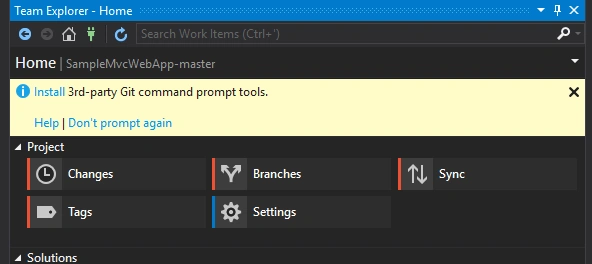
After clicking on Sync option, it will display the below screen where you have to provide the GitHub URL.
Make sure you have created this URL in GitHub before entering here.
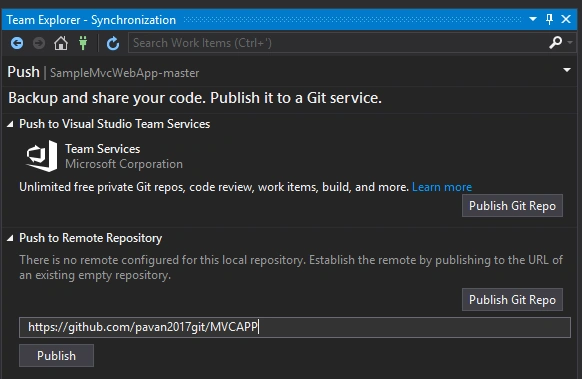
Click on the Publish button. It will ask you for the GitHub credentials; just enter them. On the successful publishing of all the files and folders, this project will appear under GitHub in the name of the MVC App.
Now, go to the GitHub and check your code under MVC APP Repo.
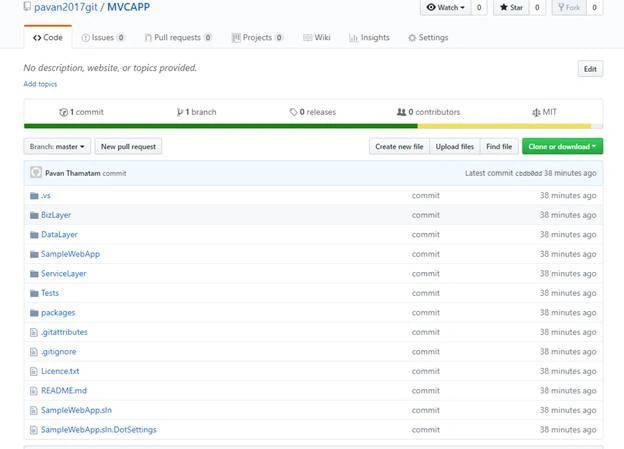
As of now, we have created a project from Visual Studio and successfully pushed to the GitHub.
How to clone an existing project from GitHub in Visual Studio
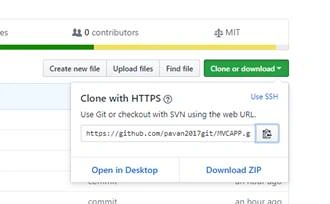
- Get URL from GitHub like below.
- Go to the Visual Studio and go to the Team Explorer where you find the "Clone" option. Click on it and give the GitHub Repo URL.
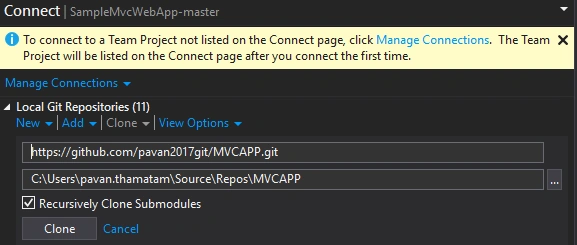
- Click on Clone and the project will be downloaded into your local folder. By default, Visual Studio creates a master branch. We don’t work on this branch. We have to create our own local branch out of it and start working on it.
- To create a local branch, go to Team Explorer under Branches tab, click on "New Branch" and give a branch name you like.
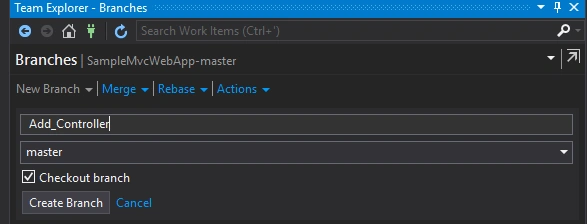
- Once you click on the "Create Branch" button, you will see the created branch under the branch list.
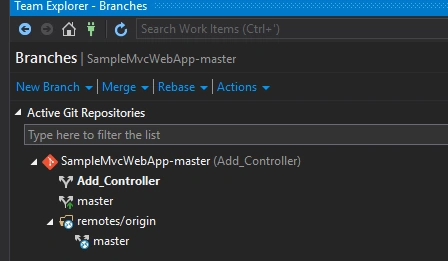
- Now, we have to start working the on new branch (Add_Controller) and push changes to remote. Once you push changes on GitHub, the Add_Controller branch would be created.

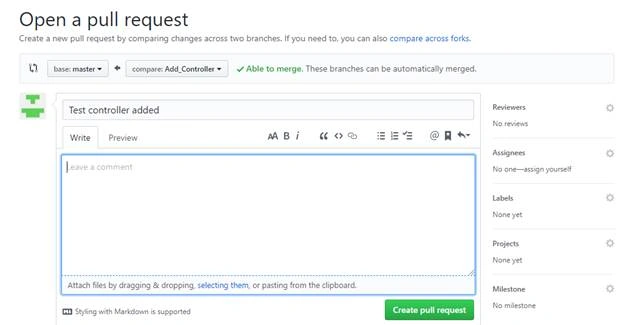
- Now, we have to create a pull request in order to merge these changes to the master branch.
- Once you've clicked on the pull request, it will show the below screen where you can add Reviewers who you want to review your code changes.
- Once the Pull Request is raised successfully, you'll see the below screen.
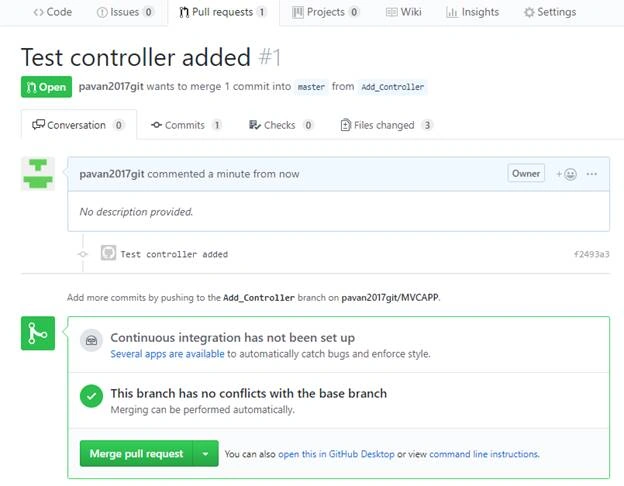
- Once you click on the "Merge pull Request" button, the changes which we made in Add_Controller branch will automatically merge to the master.
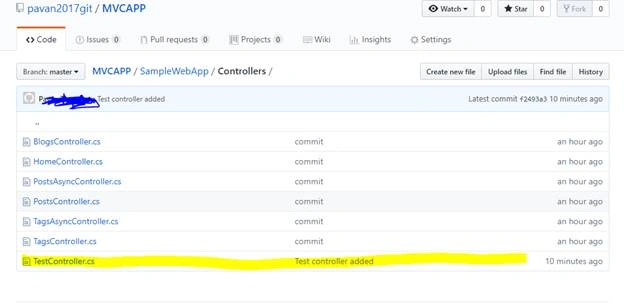
- Once this step is over, go to the master branch and check if these changes have taken effect or not.
First LastPosted Dec 4, 2018, 9:36 AM
Part 4: There was nothing there in that guide that will help me with this. So I am stuck.
First LastPosted Dec 4, 2018, 9:29 AM
Part 3: It makes no sense to have to create a new project vs working with an existing project. So instead I am going to github.com and will click the ‘Read the guide’ button for instructions there to see what I can learn.
First LastPosted Dec 3, 2018, 2:34 PM
Part 1: I am using VS professional 2015 V14.0.25431.01 Update 3. I did not have Git installed so I did so successfully using the the Tools menu and under that I selected ‘Extension and Updates’ . I closed and reopened VS and see that it is there. I click the View/Team Explorer menu. My IDE does not look like yours. On Home, its shows a Project section with Pending Changes and Settings. It has a drop down view for: home, pending changes, projects and settings. I don't see where the "Add to Source Control" option is.
First LastPosted Dec 3, 2018, 2:32 PM
Part 2: I click the projects view with a manage connections option. There are 2 sections. GitHUb (Clone|Create|Sign in). Local Git Repositories (New|Add|Clone|View Options). Each with a drop down. There is text below this: Add or clone a Git repository to get started. So not sure what to do.
Bala SPosted Aug 29, 2018, 4:40 PM
Nice Work, do more.
JosephsPosted Aug 29, 2018, 1:19 AM
Can i integration both source control like TFS and GIT Source Control