

Introduction
In this article, We will understand how to set up an Appium mobile automation project with WebdriverIO in our System.
What is Appium?
Appium is an open-source mobile testing tool that automates native, hybrid, and mobile web applications on iOS and Android platforms.
Appium was developed by Dan Cuellar.
The first version of appium was released in 2012. it was originally called was iOSauto.
Saucelabs also funded the development of appium.
It is an open-source project that is freely available to anyone who wants to use it.
How appium works?
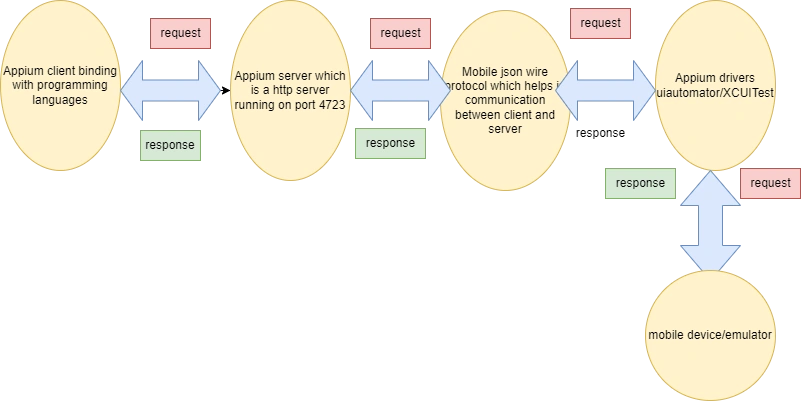
Appium contains the below components,
- Appium Server
- Appium Clients
- JSON Wire Protocol
- Automation Drivers
- Mobile Devices
Appium Server
It is the central component of the Appium architecture that runs on a machine where the automation scripts are executed. The Appium server is an http server responsible for listening to the client requests, initializing the WebDriver session, and communicating with the mobile device.
Appium Clients
Appium clients are libraries or frameworks that provide an API to write and execute test scripts in different programming languages such as Java, Python, Ruby, JavaScript, etc. These clients communicate with the Appium server to control the device.
JSON Wire Protocol
It is a protocol to communicate between the Appium client and the Appium server. The JSON Wire Protocol sends and receives HTTP requests and responses that define the automation script's actions.
Automation Drivers
Appium uses different automation drivers to interact with different types of mobile applications. For example, the UIAutomator2 driver is used to interact with Android native and hybrid applications, while the XCUITest driver is used to interact with iOS native applications.
Mobile Devices
The mobile device is under test (DUT), which is connected to the Appium server through a USB cable or a Wi-Fi network. The Appium server sends commands to the device to perform actions, such as tapping, swiping, or entering text.
We need to install the below tools to work under appium with webdriverIO
Node JS needs to be installed
Check this blog to install NodeJS.
Visual studio code IDE
- Visit https://code.visualstudio.com/
- Download the visual studio code IDE with respect to your OS and Architecture.
- Run the exe file and follow the instructions and download it.
Java
- Visit Oracle link
- Download the JDK exe file with respect to your OS and Architecture
- Run the .exe file and install JDK.
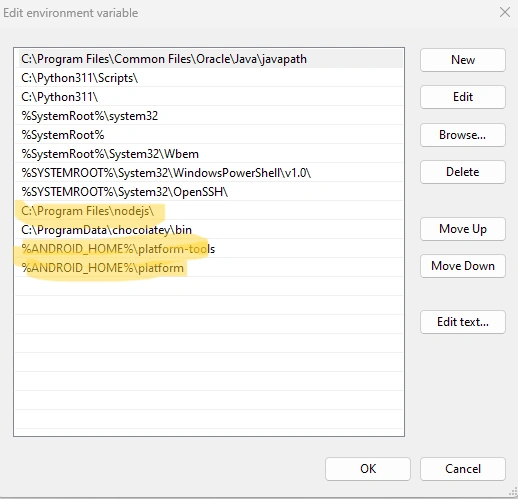
- Set the Java path in the environment variables section
- Add the path C:\Program Files\Common Files\Oracle\Java\javapath in the path section of the environment variable
Note. Screenshot of the environment variable section
Android Studio
- Visit Android site
- Download the Android Studio
- It will take time to download
- Set the android sdk path, android tool path, and android platform tools path in the environment variables section.
- The SDK folder will not be available unless we install the sdk package from the Android Studio.
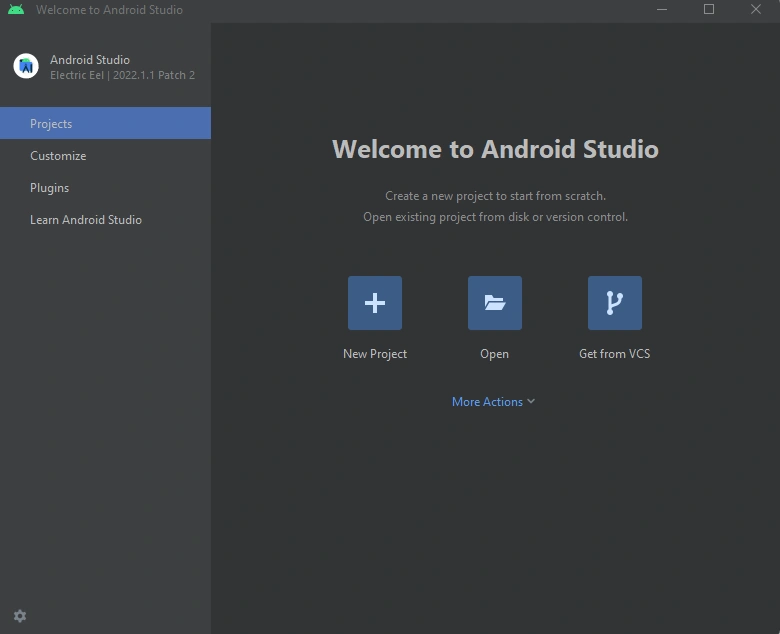
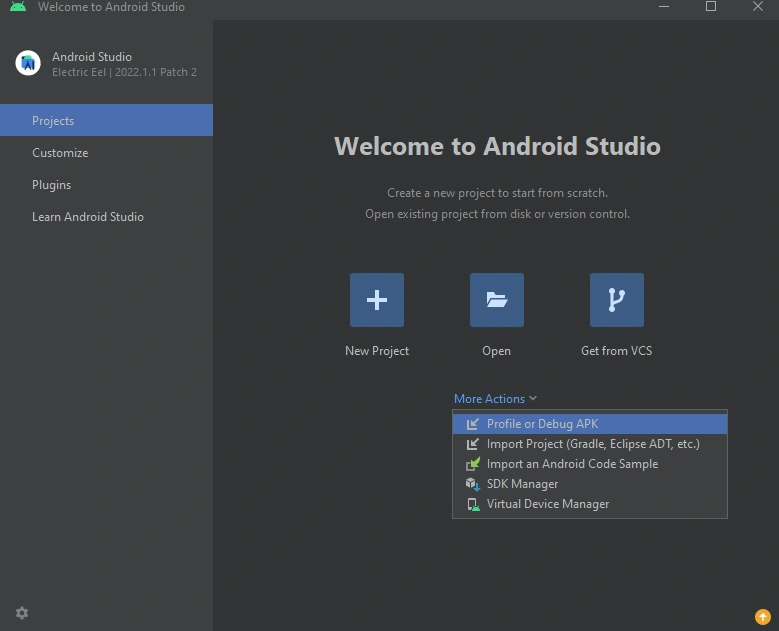
After installing the android studio, open the Android Studio
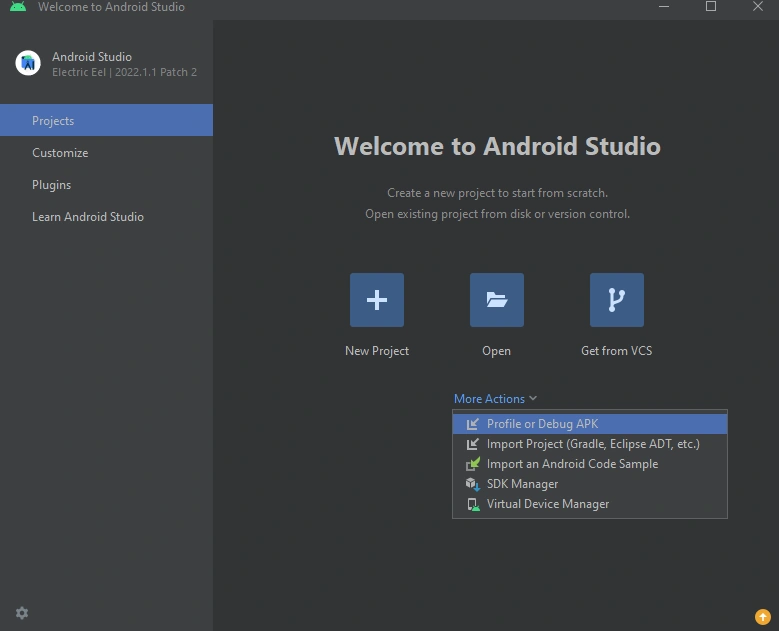
Click the more actions dropdown
Note. Screenshot of Android Studio when you open up first.
Click SDK manager
Select the sdk tools section tab and download the selected tools from the below screenshot; you will get platform and platform tools folders in the location where your Android studio got installed.
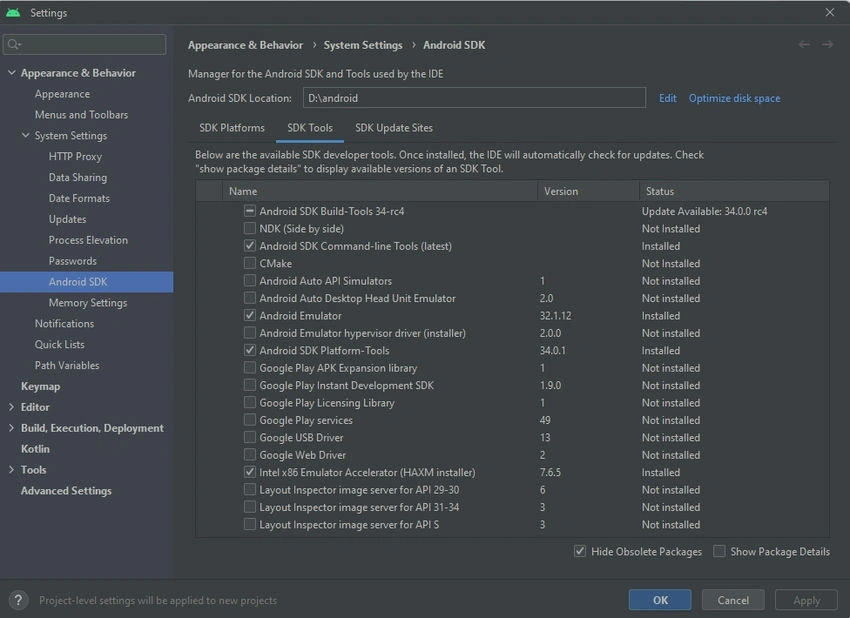
Note. Android Studio will be downloaded in the c directory by default, but I changed the location to D drive while installing it in my System.
Setting up emulator
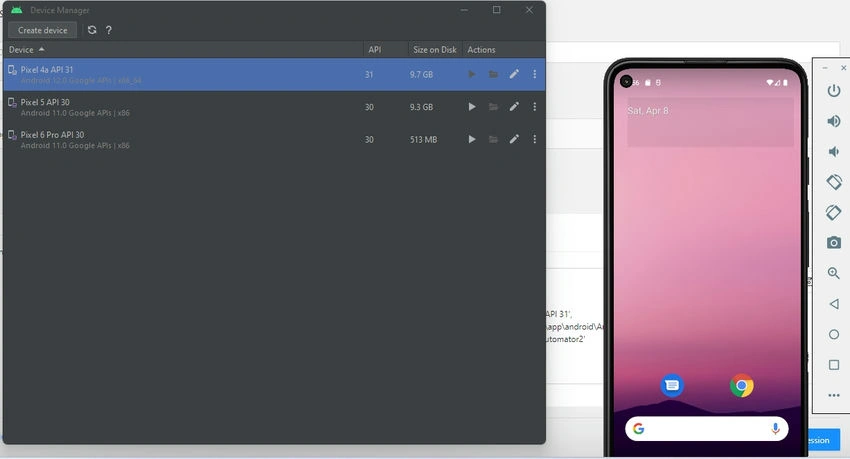
Create an emulator using a virtual device manager
- Click the more actions option
- Select the virtual device manager
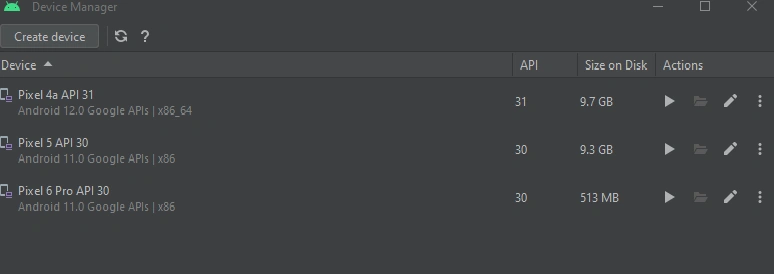
- A virtual device manager popup will open.
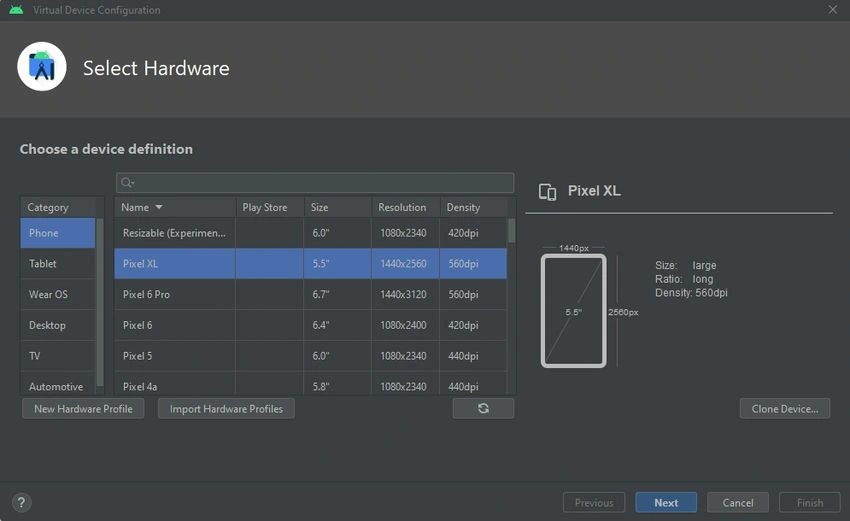
- Click create device button.
- Provide the device name, and if you want, you can add a name for the device.
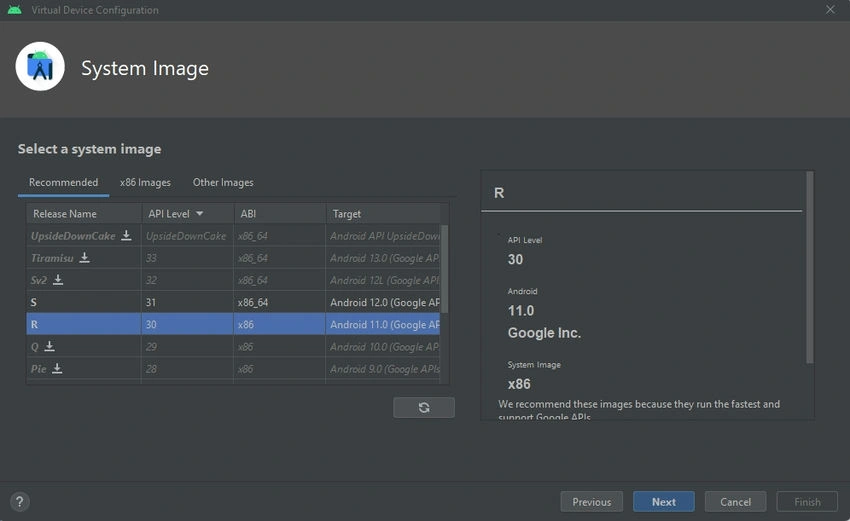
- Provide the OS on which you will spin up the emulator device. If you are downloading an OS, it will take time to download, and then click next.
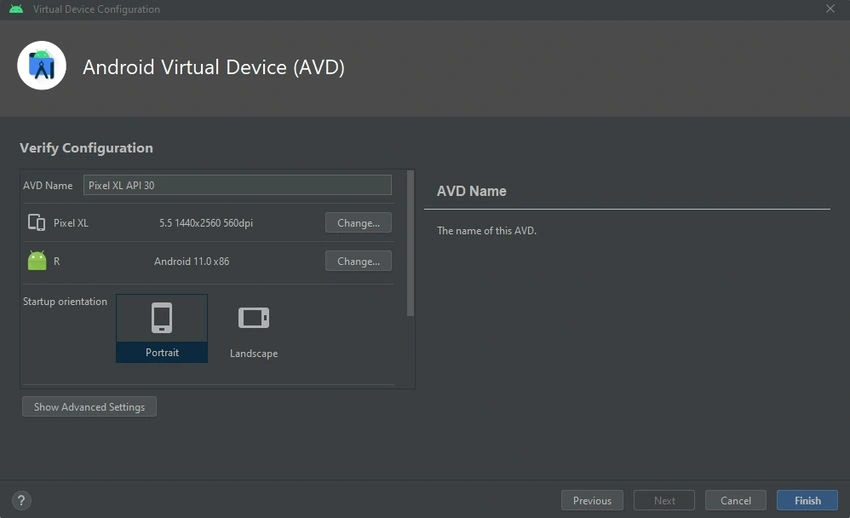
- The last step will be to verify the device's configuration, check all the os and devices selected is correct, and then click finish.
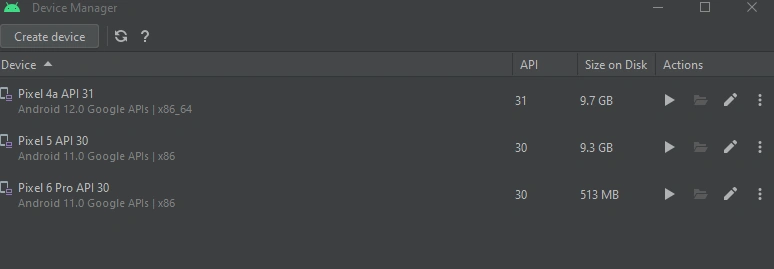
- Your device will get created and will get added to the list of virtual devices in the virtual device popup screen.
- Now click the play button to run the emulator device.
Virtual device manager popup screen
Appium inspector
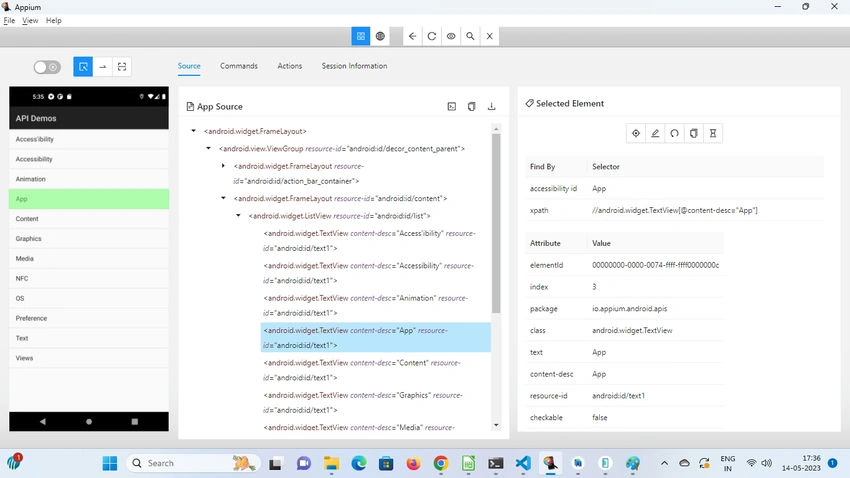
Appium inspector is a tool that helps us to pick the elements from the Android or ios application.
- Visit this GitHub link.
- Click on the Appium-Inspector-windows-2023.5.1.exe to download the appium inspector.
- Installation is easy. Click on the exe file and follow the instructions to install it in your System.
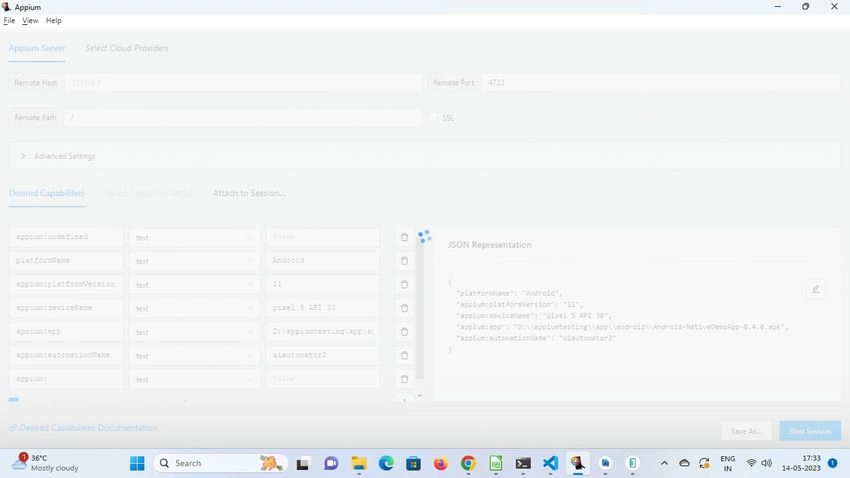
- Once you open the appium inspector, it will look like this.
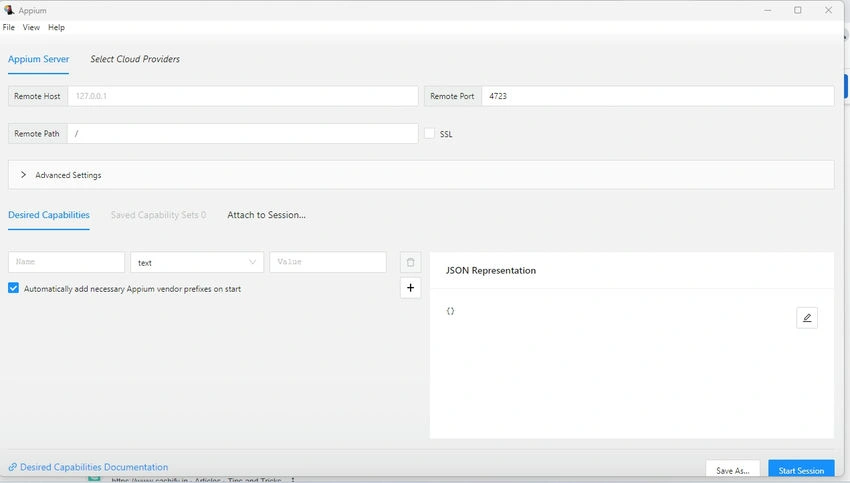
We need to set up an appium inspector to get the locators of the elements in the Android app, which we will test.
Add the desired capabilities in the capabilities section of the appium inspector app.
Desired capabilities
- DesiredCapabilities are a set of key-value pairs encoded as a JSON object.
- We define the operating systems, browser combinations, and browser versions so that when our test scripts run, it reads these values and performs tests on this OS and browser version.
Note. Make sure you have two emulators created. One emulator device to run your test and another emulator device to get the locators of the elements inside the Android app.
{
  "platformName": "Android",
  "appium:platformVersion": "11",
  "appium:deviceName": "pixel 5 API 30",
  "appium:app": "D:\\appiumtesting\\app\\android\\ApiDemos-debug.apk",
  "appium:automationName": "uiautomator2"
}
Add the port number of the appium. By default, appium will run on port 4723. if you want, we can change the port number as well.
To change the appium port and run, provide the command appium -p 4724 and hit enter. Then the appium port will run on port 4724.
You need to have the emulator device in the running state.
Run the appium server by opening the cmd and type appium
appium
The appium server will start running.

Click the start session.
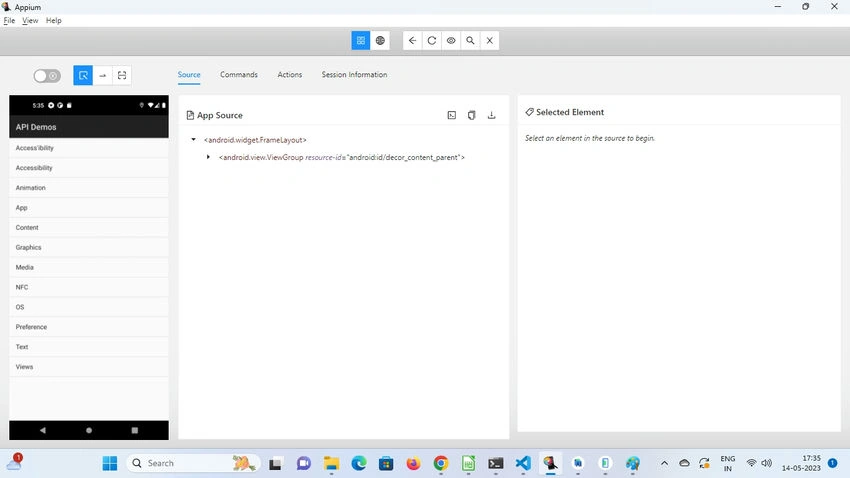
Session launching
After the session is launched, the appium inspector will look like this
(Refer to the below screenshot)
On the left-hand side, we will find all the locators for the element which you clicked.
Appium doctor
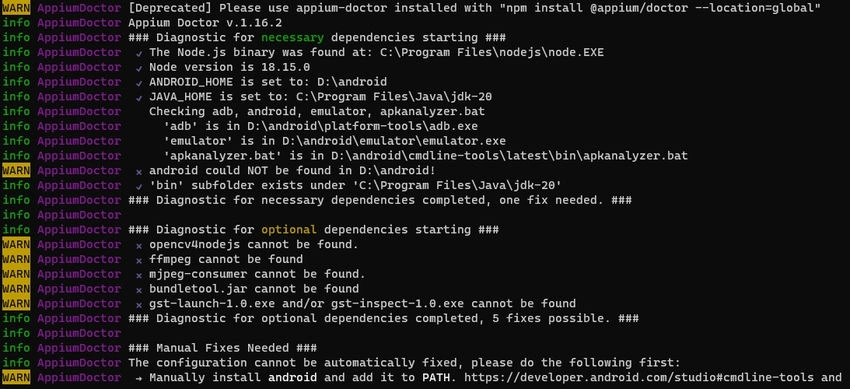
Appium Doctor is an npm library that helps us check whether we have set up all the environment variables paths for the Java, Android studio, and Node JS so that we can run the Android or ios tests without any issues.
- Open the terminal
- type the below command to install appium doctor
- npm install appium-doctor -g
- To check whether all the paths are set correctly
- type
- appium-doctor --Android
We need to get tick marks in the console against the environment path for Java, Android Studio, and Node JS.
Screenshot of the results after running the command appium-doctor --Android
Appium drivers
- UIAutomator2
- XCUITest
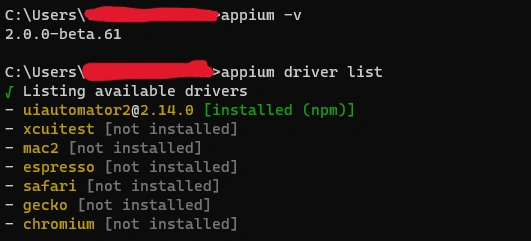
Use the below commands to install the appium drivers.
- appium driver install xcuitest
- appium driver install uiautomator2
To verify if it has been installed, you can run the appium driver list.
Appium Download
To download the Appium, open the terminal and the type
npm install appium@next
It will install the Appium 2 version in your System.
To check that Appium is installed,
Type
appium -v
you will get the version of the appium
How to Setup WebdriverIO Project using Appium?
- Create a folder in any directory
- open the folder in visual studio code
- open the terminal in visual studio code
Type
npm init wdio .
It will prompt you to add config type yes
now you get several configuration questions for your project.
We need to answer this question.
- Where is your automation backend located? On my local machine/Saucelabs/browserstack/chromedriver service
- Toggle through the options and select the option you need.
- Which framework do you want to use? mocha/jasmine
- Do you want to use a compiler? No!/babel
- Where are your test specs located? ./test/specs/**/*.js
- The default will take this folder for writing the test cases if you hit enter.
- Do you want WebdriverIO to autogenerate some test files? Yes/No
- Do you want to use page objects (https://martinfowler.com/bliki/PageObject.html)? Yes/No
- Where are your page objects located? ./test/pageobjects/**/*.js
- Default - it will take this folder for writing the test cases if you hit enter.
- Which reporter do you want to use? spec
- There will be eight reporter options. Choose any from those
- Do you want to add a plugin to your test setup?
- Do you want to add a service to your test setup? Select APPIUM Service
- What is the base URL? http://localhost
- We can provide the application URL which we are going to test. Just provide the URL of the application till .com. Later while testing the specific page, then in the browser.url command, we just add the path to the page.
- If www.example.com is the base URL
- Inside example.com, if I need to test the about us page, we can just add the path in the browser.url command
- Eg: await browser.url('/aboutus')
- When the browser instance opens, webdriver io appends the base URL with the path provided in the URL command.
- Do you want me to run `npm install` Yes
- Now at the last question, provide the yes, option
All the configurations will get installed automatically by webdriver io cli.
Now your folder structure will look like this,
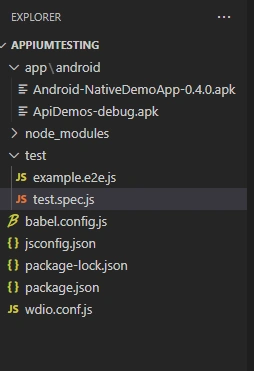
Inside the app folder, we have a subfolder android inside it; we have stored the apk files for the Android app, which we are going to automate.
To run your test, go to the wdio config file,
Provide the desired capabilities in the capabilities object array.
capabilities: [{

            platformName: 'Android',
           'appium:platformVersion': '12',
           'appium:deviceName': 'pixel 4a API 31',
           'appium:app':path.join(process.cwd(),"app/android/ApiDemos-debug.apk") ,
           'appium:automationName': 'uiautomator2'
    }],
Rather than referring to the full path of the apk file, we are using the path.join(process.cwd(),"app/android/ApiDemos-debug.apk"). This line will refer to the path of the apk file. I am using the path library to get the current working directory of the project and then join it with the folder location where the APK file resides.
Create a spec file and just add a test case. (it block).
describe('first mobile test', () => {
    it('checking app running test', async () => {


    })
})
Very important points to be made before running tests
- Before running your test, we need to ensure we have the emulator device on which your test will execute in a running state and the appium server running.
- Refer to the spec file you want to run in the spec object
specs: [
        'test/test.spec.js'
    ],
Now run the command.
npm run wdio
The test will run with the configuration setup in the config file with the desired capabilities provided in the capabilities object.
The above test will download the app to your emulator device and open it up. That it.
This test ensures that our app and setup are fine and we are good to go on writing tests.
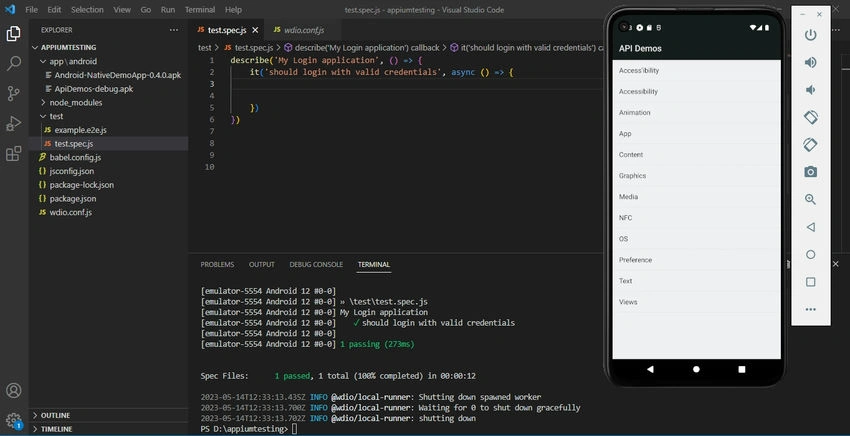
The next articles will teach us how to write Mobile tests with a demo APK file.
Summary
This article will give a detailed explanation of setting up the Appium tool with WebdriverIO. It is a little bit tricky to set this whole environment to set up. Even I stumbled upon many errors and issues while setting up. I hope you enjoy this article and this article will help you set up the environment in your System.
Thank you. Happy learning.
Join the conversation! Your thoughts help the community grow.