

This is part 9 of the Angular tutorial for Beginners series.
- Part 1: Getting started with Angular
- Part 2: Modules, Components & Directives in Angular
- Part 3: Data binding in angular
- Part 4: Interfaces
- Part 5: Services in Angular
- Part 6 discussed Observables & Http requests.
- Part 7 discussed how we can transform our output data with pipes
- Part 8 discussed how we can create nested components in Angular.
Let’s learn about routing in Part 9 of the Angular tutorial for Beginner series.
Initially when we created our project, Angular asked if we wanted to add routing. We said yes. Angular then created the app-routing.module.ts for us. It imported the RouterModule from @angular/router. This exposes the routing service and we can use routing directives. It also exposes the configured routes. We have also called the routing module for the root method. We later pass our routes here at the root level.
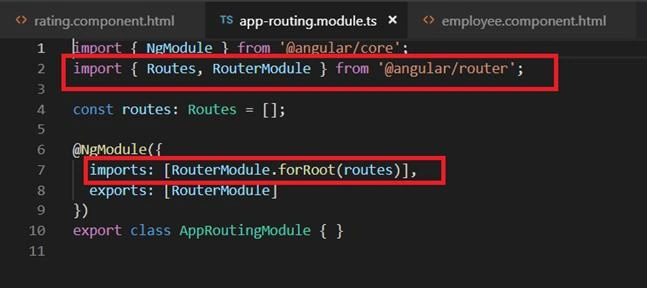
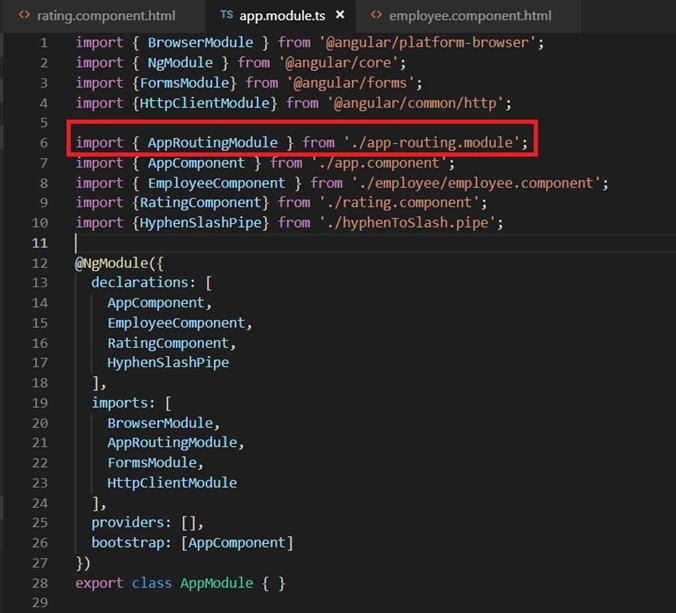
Angular also imported AppRoutingModule in the app.module.ts for us,
We will also find that a router-outlet has been added in the app.component.html.
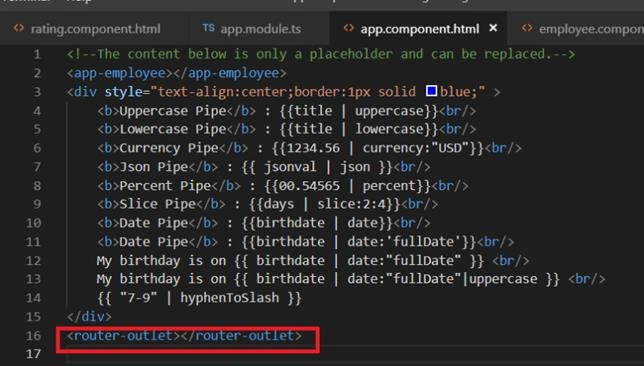
These are the changes that angular made for us when we asked it to add to routing. Now let’s have a look at how we can use them.
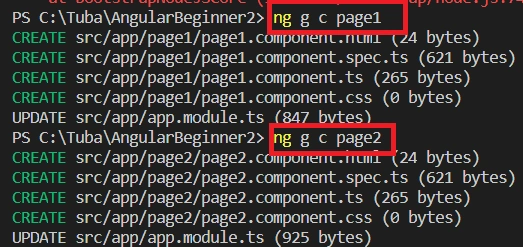
Let’s create two components to be used for our two pages as below:
- ng g c page1
- ng g c page2
- {path:'Page1', component:Page1Component},
- {path:'Page2', component:Page2Component},
And also import the component as below,
- import { Page1Component } from './page1/page1.component';
- import { Page2Component } from './page2/page2.component';
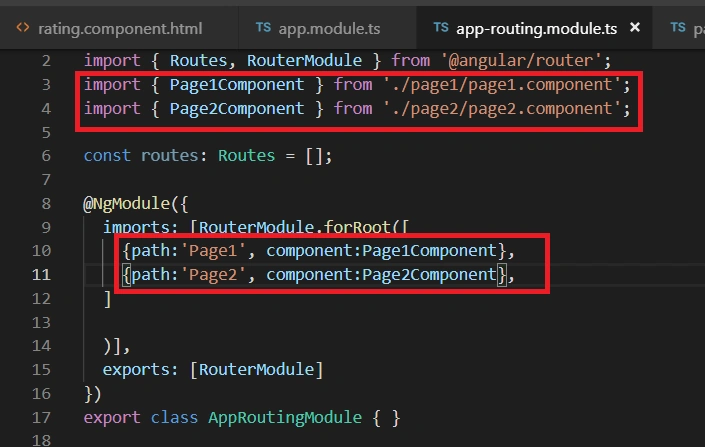
Let’s add a nav section in the app.component.html section as below,
- <nav>
- <a routerLink="/Page1">Page1</a>
- <a routerLink="/Page2">Page2</a>
- </nav>
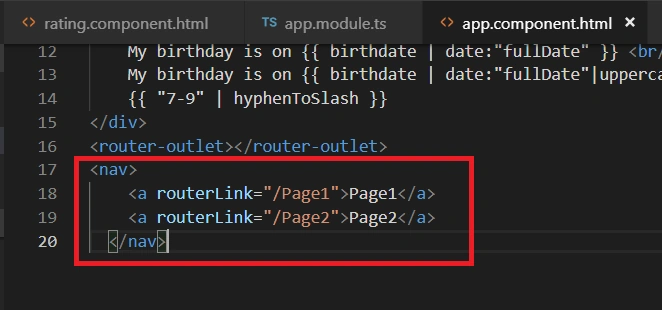
That’s all you need to do to implement routing in Angular. I will also comment out the rest of the code in the app.component.html and just keep the routing related code. Let’s open our application and have a look.
I can see it as below.

I will click on Page 1.
Notice how the URL changes and page 1 is displayed where we had written <router-outlet></router-outlet>
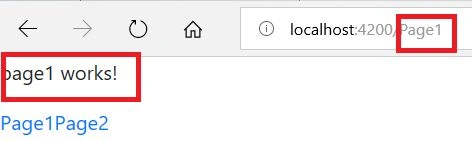
The will work similarly for Page 2.
For more information on routing visit the official angular website.
This concludes the article about routing.
This article was originally published on my website taagung.
Sundaram SubramanianPosted Aug 12, 2019, 6:26 AM
Well written, thanks for sharing
Krishan DuttPosted Jul 1, 2019, 7:07 AM
Very good article !!!
Amit MohantyPosted Jun 28, 2019, 1:44 AM
Good description !!!