

Introduction
We will create a demo project using Angular CLI for front-end, Node.js and Express for middle-end, and MongoDB for the back-end. In this article, we start from the beginning.
Requirement
- Visual Studio Code or any IDM for development.
- Node.js - if you already installed node, then check with node –v command and also check the npm command.
- MongoDB - In this project, we are using MongoDB database; you can also use SQL or other database.
If you already installed Angular CLI, globally check the version with this command ng -v
Download links
- Node - https://nodejs.org/en/download/
- VS code - https://code.visualstudio.com/
- MongoDB https://www.mongodb.com/download-center
Let’s start and create demo application.
Step 1
Create a new folder with any name, let's say, AngularCRUD. After the folder is created, then press ctrl+shift Right click for opening the command window here.
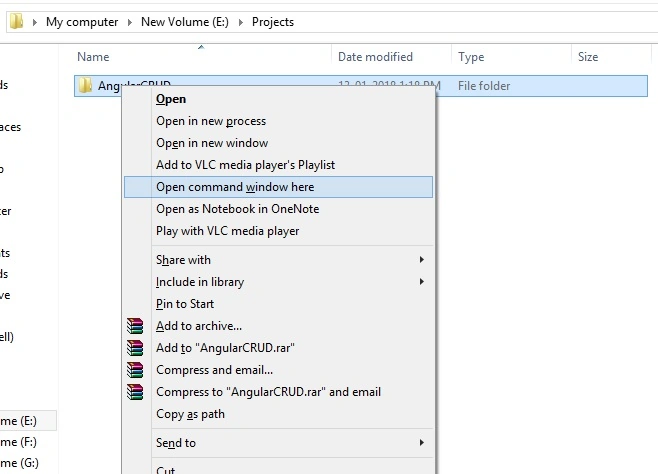
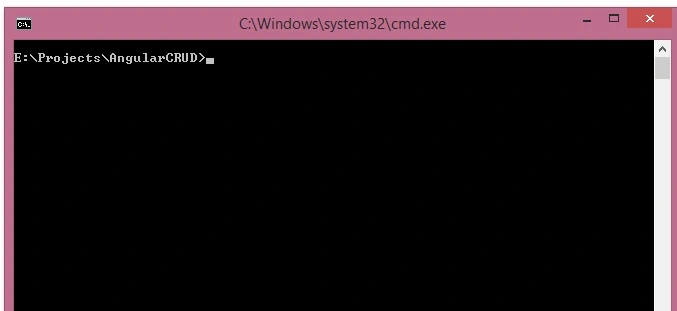
Step 2
After the folder opens in the command prompt, run this command for Angular CLI to install in our folder.
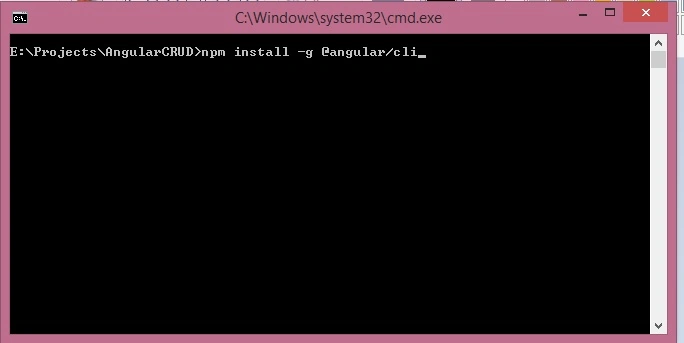
Step 3
If installed successfully, then run this command for creating a new application. Let's again set the project name as AngularCRUD.
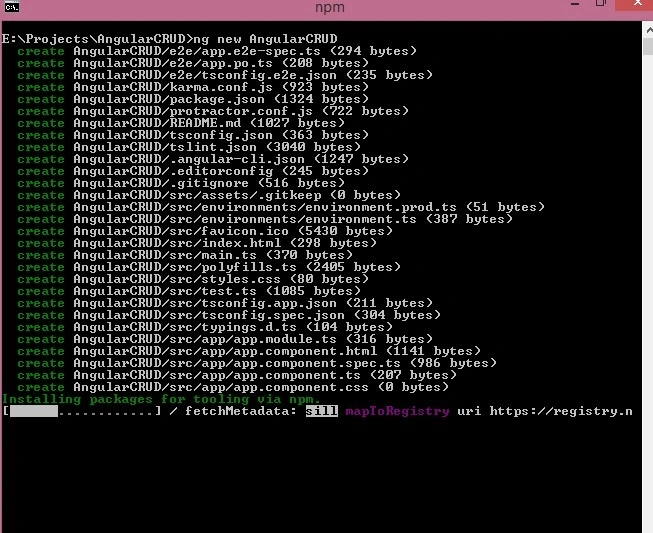
Step 4
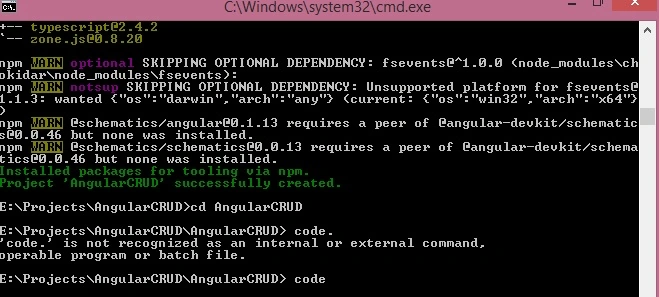
When the ng new command is created and installed successfully, change your directory
Step 5
Now, we open our project in Visual Studio code with code command like this.
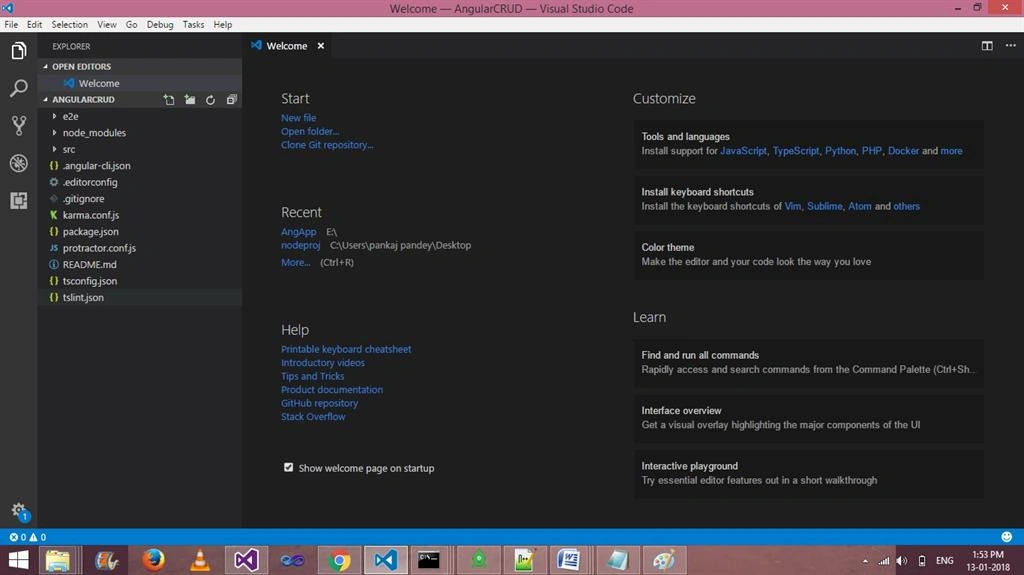
Now, we can see VSCode opened automatically.
Step 6
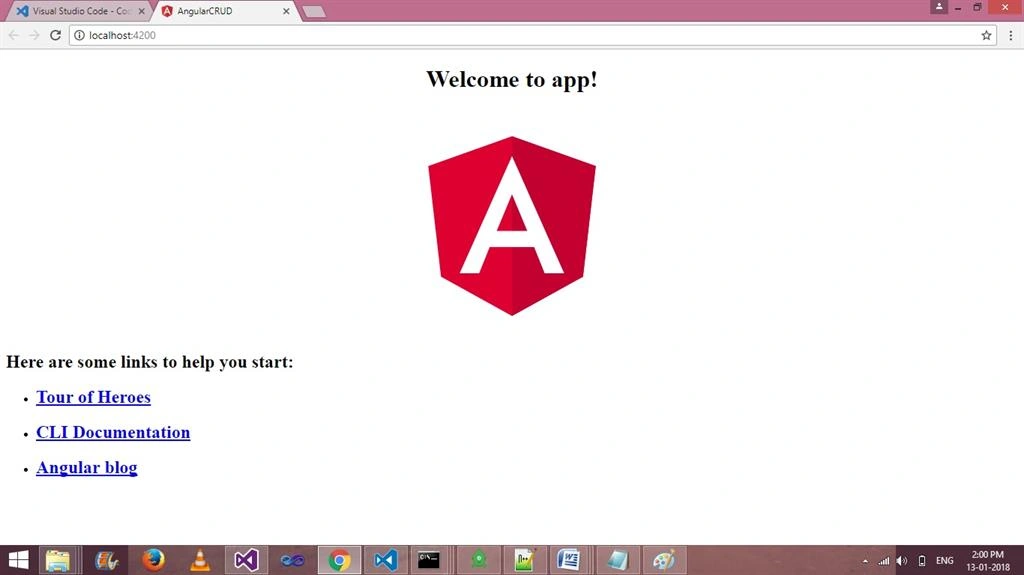
Now run your application by using this command -
Step 7
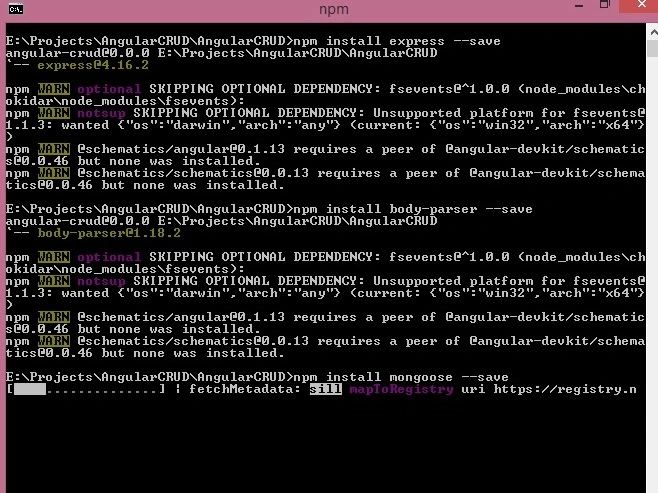
Now, let us install Express and Mongoose body parser using this command.
- npm install express --save
- npm install mongoose -- save
- npm install body-parser --save
Step 8
After installing the above three packages, create a new file, server.js.
- var express = require('express');
- var path = require("path");
- var bodyParser = require('body-parser');
- var mongo = require("mongoose");
- var db = mongo.connect("mongodb://localhost:27017/AngularCRUD", function(err, response){
- if(err){ console.log( err); }
- else{ console.log('Connected to ' + db, ' + ', response); }
- });
- var app = express()
- app.use(bodyParser());
- app.use(bodyParser.json({limit:'5mb'}));
- app.use(bodyParser.urlencoded({extended:true}));
- app.use(function (req, res, next) {
- res.setHeader('Access-Control-Allow-Origin', 'http://localhost:4200');
- res.setHeader('Access-Control-Allow-Methods', 'GET, POST, OPTIONS, PUT, PATCH, DELETE');
- res.setHeader('Access-Control-Allow-Headers', 'X-Requested-With,content-type');
- res.setHeader('Access-Control-Allow-Credentials', true);
- next();
- });
- var Schema = mongo.Schema;
- var UsersSchema = new Schema({
- name: { type: String },
- address: { type: String },
- },{ versionKey: false });
- var model = mongo.model('users', UsersSchema, 'users');
- app.post("/api/SaveUser",function(req,res){
- var mod = new model(req.body);
- if(req.body.mode =="Save")
- {
- mod.save(function(err,data){
- if(err){
- res.send(err);
- }
- else{
- res.send({data:"Record has been Inserted..!!"});
- }
- });
- }
- else
- {
- model.findByIdAndUpdate(req.body.id, { name: req.body.name, address: req.body.address},
- function(err,data) {
- if (err) {
- res.send(err);
- }
- else{
- res.send({data:"Record has been Updated..!!"});
- }
- });
- }
- })
- app.post("/api/deleteUser",function(req,res){
- model.remove({ _id: req.body.id }, function(err) {
- if(err){
- res.send(err);
- }
- else{
- res.send({data:"Record has been Deleted..!!"});
- }
- });
- })
- app.get("/api/getUser",function(req,res){
- model.find({},function(err,data){
- if(err){
- res.send(err);
- }
- else{
- res.send(data);
- }
- });
- })
- app.listen(8080, function () {
- console.log('Example app listening on port 8080!')
- })
Step 9
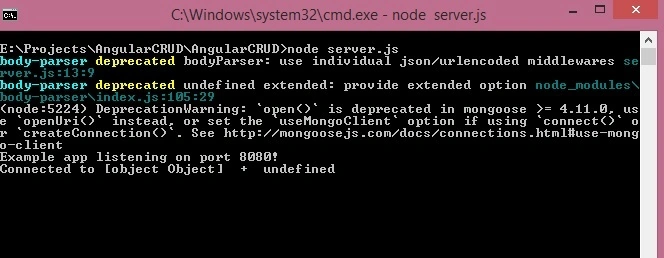
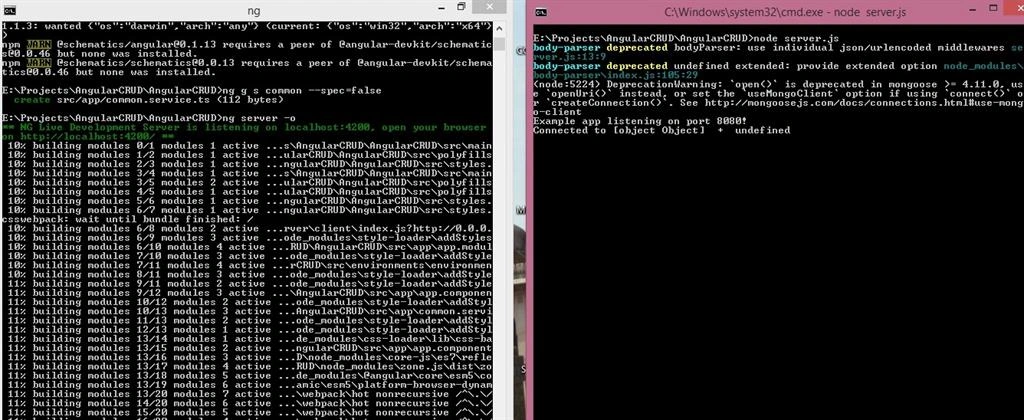
Let us open the project folder in other command prompt and run the node server.js on port 8080.
Setp 10
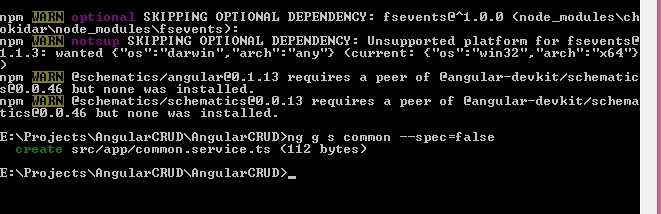
Create a new Angular Service for common AJAX API calling. Use thie commond
Step 11
Write the following code in common.service.ts for API.
- import { Injectable } from '@angular/core';
- import {Http,Response, Headers, RequestOptions } from '@angular/http';
- import { Observable } from 'rxjs/Observable';
- import 'rxjs/add/operator/map';
- import 'rxjs/add/operator/do';
- @Injectable()
- export class CommonService {
- constructor(private http: Http) { }
- saveUser(user){
- return this.http.post('http://localhost:8080/api/SaveUser/', user)
- .map((response: Response) =>response.json())
- }
- GetUser(){
- return this.http.get('http://localhost:8080/api/getUser/')
- .map((response: Response) => response.json())
- }
- deleteUser(id){
- return this.http.post('http://localhost:8080/api/deleteUser/',{'id': id})
- .map((response: Response) =>response.json())
- }
- }
Now, write the View code in app.module.ts file.
- import { BrowserModule } from '@angular/platform-browser';
- import { NgModule } from '@angular/core';
- import { HttpModule } from '@angular/http';
- import { FormsModule } from '@angular/forms';
- import { AppComponent } from './app.component';
- import {CommonService} from './common.service';
- @NgModule({
- declarations: [
- AppComponent
- ],
- imports: [
- BrowserModule,HttpModule,FormsModule,
- ],
- providers: [CommonService],
- bootstrap: [AppComponent]
- })
- export class AppModule { }
Code for app.component.html.
- <form #userForm="ngForm" (ngSubmit)="onSave(userForm.value)" novalidate>
- <p>Is "myForm" valid? {{userForm.valid}}</p>
- <table border='1'>
- <tr>
- <td>name</td>
- <td>
- <input name="id" type="hidden" [(ngModel)]="id" />
- <input name="name" type="text" required [(ngModel)]="name" />
- </td>
- </tr>
- <tr>
- <td>address</td>
- <td> <input name="address" required type="text" [(ngModel)]="address" /></td>
- </tr>
- <tr>
- <td colspan="2">
- <input type="submit" value="{{valbutton}}" />
- </td>
- </tr>
- </table>
- </form>
- <table border='1'>
- <tr>
- <td>Id</td>
- <td>Name</td>
- <td>Address</td>
- <td>Edit</td>
- <td>Delete</td>
- </tr>
- <tr *ngFor="let kk of Repdata;let ind = index">
- <td>{{ind + 1}}</td>
- <td>{{kk.name}}</td>
- <td>{{kk.address}}</td>
- <td><a (click)="edit(kk)" style="color:blueviolet">Edit</a></td>
- <td><a (click)="delete(kk._id)" style="color:blueviolet">Delete</a> </td>
- </tr>
- </table>
Write this code in app.component.ts and remove the existing code from this file.
- import { Component, OnInit } from '@angular/core';
- import {FormGroup,FormControl,Validators,FormsModule, } from '@angular/forms';
- import {CommonService} from './common.service';
- import {Http,Response, Headers, RequestOptions } from '@angular/http';
- @Component({
- selector: 'app-root',
- templateUrl: './app.component.html',
- styleUrls: ['./app.component.css']
- })
- export class AppComponent {
- constructor(private newService :CommonService,) { }
- Repdata;
- valbutton ="Save";
- ngOnInit() {
- this.newService.GetUser().subscribe(data => this.Repdata = data)
- }
- onSave = function(user,isValid: boolean) {
- user.mode= this.valbutton;
- this.newService.saveUser(user)
- .subscribe(data => { alert(data.data);
- this.ngOnInit();
- }
- , error => this.errorMessage = error )
- }
- edit = function(kk) {
- this.id = kk._id;
- this.name= kk.name;
- this.address= kk.address;
- this.valbutton ="Update";
- }
- delete = function(id) {
- this.newService.deleteUser(id)
- .subscribe(data => { alert(data.data) ; this.ngOnInit();}, error => this.errorMessage = error )
- }
- }
Summary
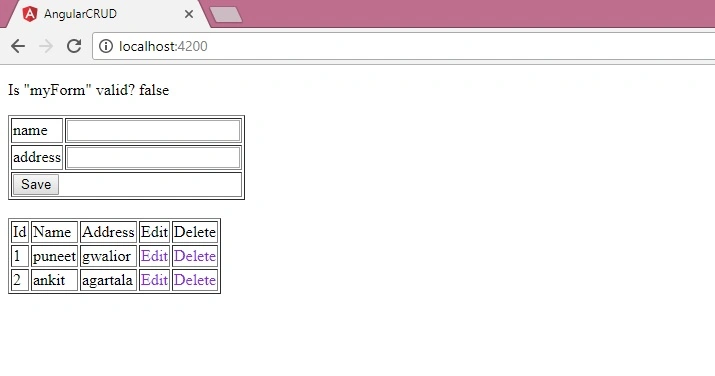
In this article, we learned how to create CRUD application with Angular 5 and node. I hope you enjoyed this article. If you have any query related to this code, please comment in the comments section.
Dheeraj PaladiPosted Aug 25, 2021, 9:06 PM
Can I get the table outputs in command prompt when I connect mongodb server through command prompt
Y VenkatPosted Aug 22, 2021, 7:10 AM
Hi Puneet, i am new to mongodb, could you pls send me schema for checkbox, radiobutton and dropdown. pls help me
harsh kansaraPosted Jul 2, 2019, 1:53 AM
Please share me link to download project
deepak upadhyaPosted Jan 27, 2019, 11:06 PM
Hi Puneet, I am new to mongodb, Can you please send me Schema for country and state collection also angular code for the same. please help me.
deepak upadhyaPosted Jan 25, 2019, 6:50 AM
I am working on a project where i am using mongodb as a backend and angular2 for front end. I have two collections in db as Country{id, countryname} and state{id, statename} I want to find all the states depending on the country , I tried to write a code using $lookup but getting nothing. Also i need to use these two collections in an angular application for cascading dropdown. If i Select “India” only “States” in india should populate.I am new to mongodb. Plz help
deepak upadhyaPosted Jan 25, 2019, 6:50 AM
Thanks a lot.
manish sharmaPosted Jan 17, 2019, 3:20 AM
This.http.post(...).map is not a function error is coming
Ghanshyam pandeyPosted Dec 27, 2018, 12:57 AM
Hi please provide code in my email : [email protected] ..Thanks
manasa rPosted Sep 25, 2018, 6:03 AM
Can you please mail this working code to the email [email protected]
Sukhvinder SinghPosted Sep 12, 2018, 12:50 AM
How can we check for the Api path
vipin rajPosted Aug 26, 2018, 10:19 AM
How can i daploy this application in aws
vikas bhutaniPosted Aug 9, 2018, 6:14 AM
Good working artical,just one update for angular 6 in service section use pipe property else map property will not work,thanks for the artical
Ertem YazıcıPosted Aug 9, 2018, 3:41 AM
Thanks for great tuttorial but where is the project files download link?
raghu kPosted Aug 6, 2018, 4:57 AM
Hi i am new to mongodb , when i try to run 'node server.js' i am getting below error { MongoNetworkError: failed to connect to server [localhost:27017] on first connect [MongoNetworkError: connect ECONNREFUSED 127.0.0.1:27017]
Bikesh SrivastavaPosted Jun 28, 2018, 2:18 AM
Can you share complete code fro crud operation on [email protected] / GitHub link.
Chaitu BurlePosted May 23, 2018, 11:46 PM
Instead of a map can we write another functionality because in my visual code map is not working can you please help me with another function
John DarlinPosted May 4, 2018, 8:46 AM
Hi, so I followed the steps and added it to the current project I was working on, and I have the visual, but nothing happens when I click the save button, even when the input is valid, meaning I cannot add entries. Please advise if you don't mind.
Fokam RudolfPosted Apr 20, 2018, 7:19 AM
Please there server for node Js how do we start it . I have a problem with it I have checked my files and can't see who I get an error message
rajkumar dorkhandePosted Apr 16, 2018, 2:31 AM
Good Article. explaination is very short and understandable.
ihsen gamPosted Apr 14, 2018, 12:34 PM
Hello thanks for the tutorial but it seems that i have a problem in the file server.js because it doesn't show the same result like you :body-parser deprecated bodyParser: use individual json/urlencoded middlewares server.js:14:9body-parser deprecated undefined extended: provide extended option node_modules\body-parser\index.js:105:29events.js:183 throw er; // Unhandled 'error' event ^ Error: listen EADDRINUSE :::8080 at Object._errnoException (util.js:1024:11) at _exceptionWithHostPort (util.js:1046:20) at Server.setupListenHandle [as _listen2] (net.js:1351:14) at listenInCluster (net.js:1392:12) at Server.listen (net.js:1476:7) at Function.listen (C:\Users\Asus\MongoApp\node_modules\express\lib\application.js:618:24) at Object.<anonymous> (C:\Users\Asus\MongoApp\server.js:91:5) at Module._compile (module.js:635:30) at Object.Module._extensions..js (module.js:646:10) at Module.load (module.js:554:32) at tryModuleLoad (module.js:497:12) at Function.Module._load (module.js:489:3) at Function.Module.runMain (module.js:676:10) at startup (bootstrap_node.js:187:16) at bootstrap_node.js:608:3
Hmaidi SoufienPosted Mar 11, 2018, 11:23 AM
Hello thanks for the good tutorial.but I have a problem" GET http: // localhost: 8080 / api / getUser / net :: ERR_CONNECTION_REFUSED " you can help me if you palis I'm a beginner
Junior FerreiraPosted Jan 30, 2018, 5:34 AM
Pagination ? combobox ? Search ?
Former memberPosted Jan 19, 2018, 12:19 AM
Good ........very nice
Sagar Pandurang KapPosted Jan 14, 2018, 11:40 PM
Very nice article.Explaination is very good and easy to understand.\
Arvind SinghPosted Jan 14, 2018, 2:25 AM
Good explanation steps... keep it up.....
Ramdutt PathakPosted Jan 13, 2018, 12:19 PM
Good brother keep it up