

Introduction
This article demonstrates how to create and use a button control in Android. This article will also describe how to add the different styles to a button using XML style. This article starts with an introduction of the button tag in XML. In Android, all the UI controls need two required attributes, and they are the width and the height. We need to specify the width and the height for each and every control in Android. Afterwards, it demonstrates how to add the listeners for a button, using a click.
Creating a Button
- <Button
- android:layout_width="wrap_content"
- android:layout_height="wrap_content" />
- <Button
- android:layout_width="wrap_content"
- android:text="Hello"
- android:layout_height="wrap_content" />
wrap_content
This means the width/height of the button will depend on the content of the button. Please see the output, below, to understand, how this will work.
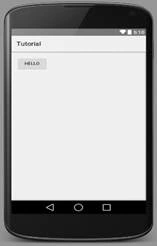
The second value that can be accepted by a button for the width/height is:
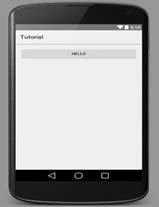
match_parent
This will occupy all the space that its parent has as the width/ height, depending upon what you have provided. Please see the output in which I have given the width as match_parent.
If I had given height as match_parent, the height will be the same as its parents height.
Adding Style to a Button
Now, we can add some styles to the button, using style.xml file. Thus, we can reuse the same style for the different buttons in the same application. For this, declare a style that has the parent android.widget.button, as shown below:
- <style name="myButtonStyle" parent="android:Widget.Button">
- </style>
- <style name="myButtonStyle" parent="android:Widget.Button">
- <item name="android:textColor">#ffffff</item>
- <item name="android:textSize">15sp</item>
- <item name="android:background">#1C4DB1</item>
- <item name="android:textStyle">bold</item>
- <item name="android:gravity">center_vertical|center_horizontal</item>
- <item name="android:padding">10dp</item>
- <item name="android:layout_margin">20dp</item>
- </style>
- <Button
- android:layout_width="match_parent"
- android:text="Hello"
- style="@style/myButtonStyle"
- android:layout_height="wrap_content" />
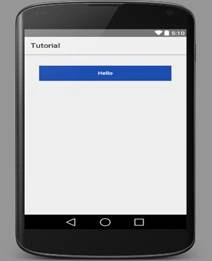
Adding a Button Click Event
By using onClick attribute, we can declare the button click event using XML and we need to define this method in a Java file, which needs to be done on the click event of the button.
- android:onClick="myButtonClick"
- public void myButtonClick(View view) {
- Log.e("Button ", "clicked");
- }
- <Button
- android:layout_width="match_parent"
- android:id="@+id/button"
- android:text="Hello"
- style="@style/myButtonStyle"
- android:layout_height="wrap_content" />
- Button button = (Button) findViewById(R.id.button);
- button.setOnClickListener(new View.OnClickListener() {
- @Override
- public void onClick(View view) {
- Log.e("Button", "Clicked");
- }
- });
In this article, I discussed how we can create a button in Android. We also saw how we can add the different styles to a button. In the end of this article, we saw how to set the click events for a button from XML and Java.
Vignesh ManiPosted Jul 6, 2016, 4:16 PM
Nice
kalu singh raoPosted Jul 6, 2016, 1:34 AM
Nice...
RajaPosted Jul 6, 2016, 12:09 AM
Good One..