

Here we will see how to add a non-existent record using an AutoCompleteBox in LightSwitch Application (Visual C#) in Visual Studio 2012.
The following is the procedure for adding a non-existent record using an AutoCompleteBox.
Step 1
Open the Solution Explorer.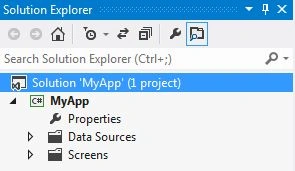
Step 2
In the Solution Explorer, right-click on the Server and choose "Add Table".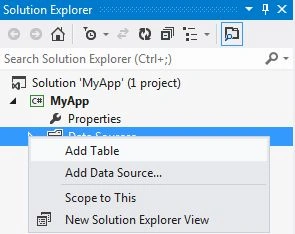
Step 3
In this way we will add two tables (one is a Student table and another one is College table). The table appears.
Student Table: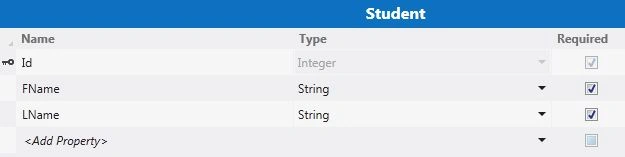
College Table: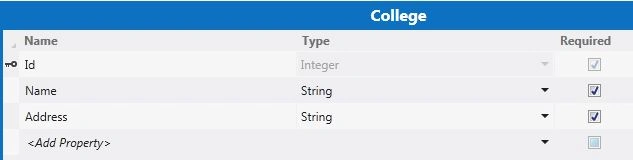
Step 4
Go to the menu bar, click the "Add Relationship" button.
The "Add New Relationship" dialog box appears on the screen. In that, establish a many to zero or one relationship between the two tables.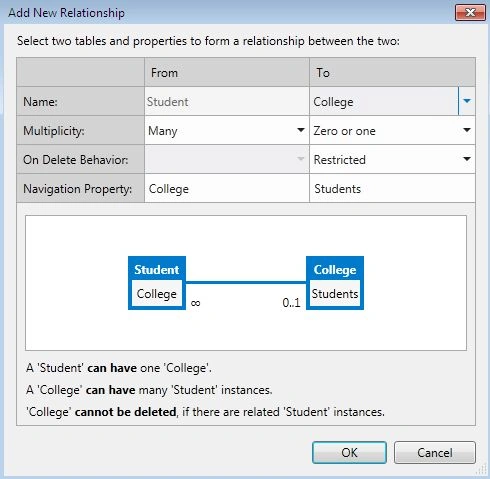
Step 5
In the Solution Explorer, right-click on the Screens and choose "Add Screen".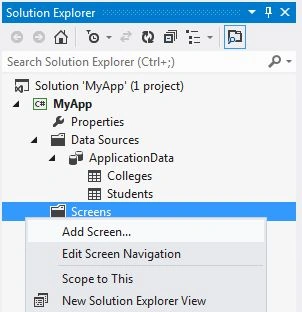
Step 6
The Add New Screen dialog box appears. Select the "Editable Grid Screen" from the Screen Template, under screen information, choose "Colleges" under the screen data and provide a name to the Screen and click the "OK" button.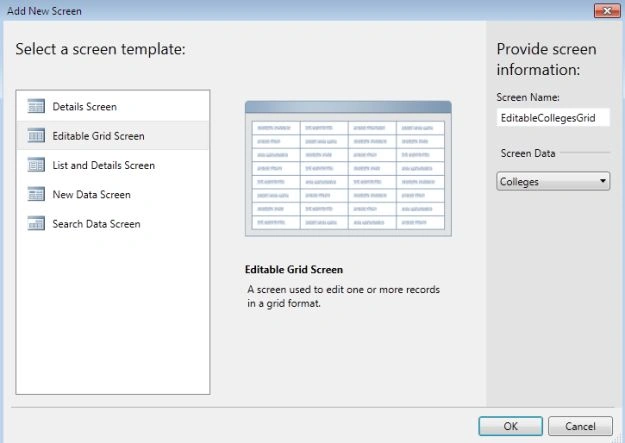
Step 7
Once again add a "New Data Screen" and from the Screen Template, under screen information, choose "Student" under screen data and provide a name for the Screen and click the "OK" button.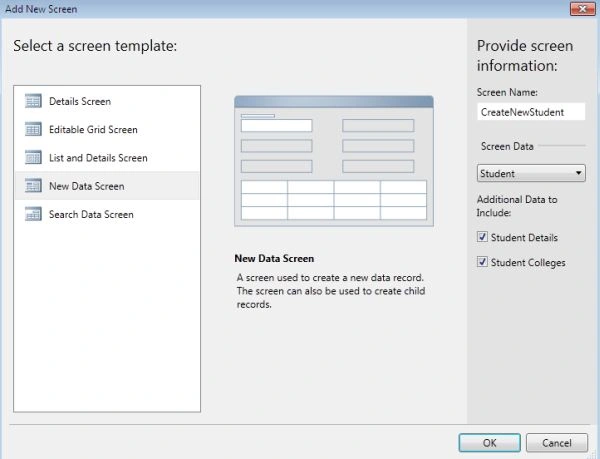
Step 8
Add "System.Windows.Controls.Input" to the client project by switching to "File View" in Solution Explorer.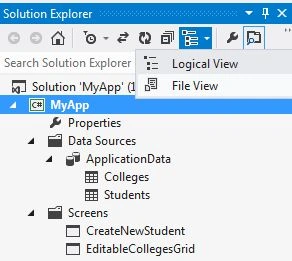
Step 9
In the Solution Explorer, right-click on the Client folder and choose "Add Reference".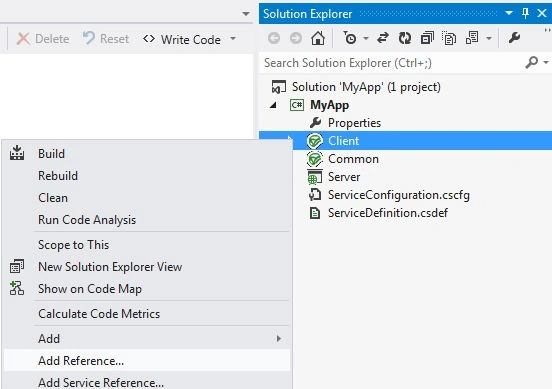
Select "System.Windows.Controls.Input" from the "Reference Manager-Client" dialog box and click "OK".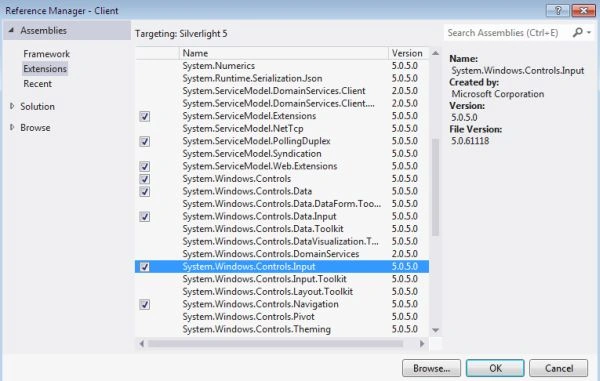
Step 10
Click on "Write Code" and choose the "_created" method.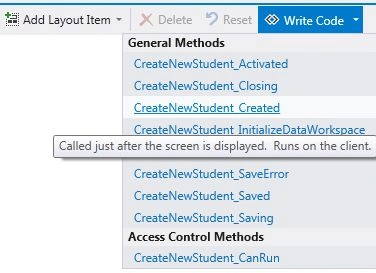
Add the following code:
using System;
using System.Linq;
using System.IO;
using System.IO.IsolatedStorage;
using System.Collections.Generic;
using Microsoft.LightSwitch;
using Microsoft.LightSwitch.Framework.Client;
using Microsoft.LightSwitch.Presentation;
using Microsoft.LightSwitch.Presentation.Extensions;
namespace LightSwitchApplication
{
public partial class CreateNewStudent
{
partial void CreateNewStudent_InitializeDataWorkspace(global::System.Collections.Generic.List<global::Microsoft.LightSwitch.IDataService> saveChangesTo)
{
// Write your code here.
this.StudentProperty = new Student();
}
partial void CreateNewStudent_Saved()
{
// Write your code here.
this.Close(false);
Application.Current.ShowDefaultScreen(this.StudentProperty);
}
partial void CreateNewStudent_Activated()
{
IContentItemProxy comboControl = this.FindControl("College");
comboControl.SetBinding(System.Windows.Controls.ComboBox.ItemsSourceProperty, "Screen.Colleges", System.Windows.Data.BindingMode.TwoWay);
comboControl.SetBinding(System.Windows.Controls.ComboBox.SelectedItemProperty, "Screen.StudentProperty.College", System.Windows.Data.BindingMode.TwoWay);
}
partial void CreateNewStudent_Created()
{
// Write your code here.
this.FindControl("College").ControlAvailable += CollegeFieldAvailable;
}
private void CollegeFieldAvailable(object sender, ControlAvailableEventArgs e)
{
((System.Windows.Controls.Control)e.Control).LostFocus += CollegeFieldChanged;
}
private void CollegeFieldChanged(object sender, System.Windows.RoutedEventArgs e)
{
string txtComboText = ((System.Windows.Controls.AutoCompleteBox)sender).Text;
this.Details.Dispatcher.BeginInvoke(() =>
{
if (!string.IsNullOrEmpty(txtComboText))
{
College selectedCollege = this.DataWorkspace.ApplicationData.Colleges.Where(College => College.Name == txtComboText).FirstOrDefault();
if (selectedCollege == null)
{
//Category doesn't exists
if (this.ShowMessageBox("Do you want to add the college " + txtComboText + "?", "Add College", MessageBoxOption.YesNo) == System.Windows.MessageBoxResult.Yes)
{
selectedCollege = this.DataWorkspace.ApplicationData.Colleges.AddNew();
selectedCollege.Name = txtComboText;
this.StudentProperty.College = selectedCollege;
}
}
}
});
}
}
}
Step 11
Press F5 to run the application and choose create new screen. We get: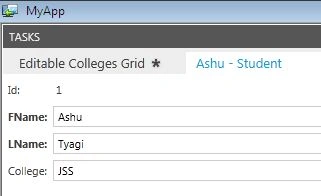
Join the conversation! Your thoughts help the community grow.