

Introduction
Amazon Route 53 is a highly available and scalable Domain Name System (DNS) service that simplifies the management and routing of traffic for custom domains. Whether you're hosting a website, web application, or any other cloud-based service, Route 53 offers reliable DNS management tailored for performance and flexibility.
In this article, we'll walk through the configuration steps for both AWS (Route 53) and Namecheap to help you seamlessly connect your custom domain.
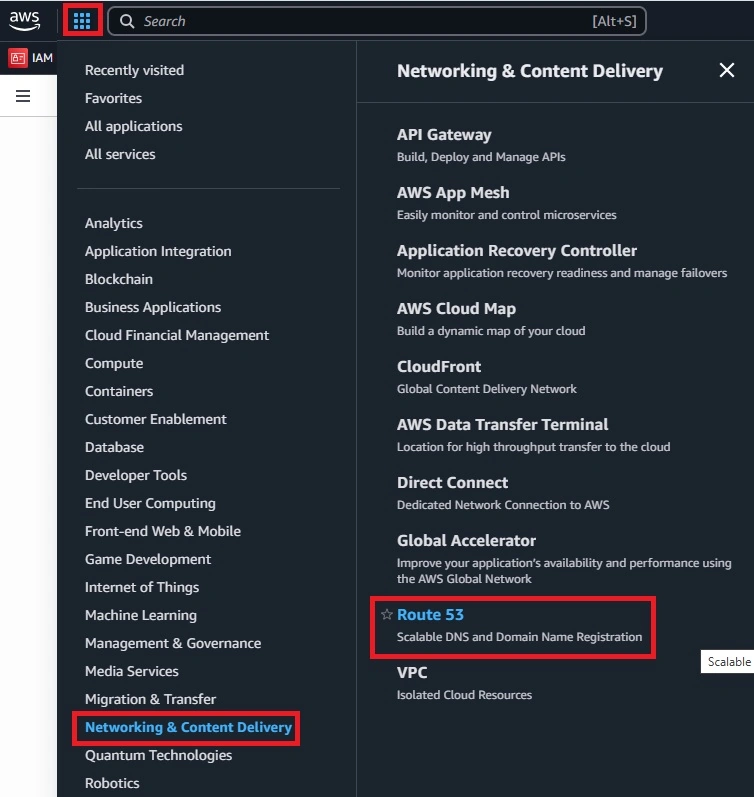
Step 1. Log in to the AWS Account, go to Networking & Content Delivery, and select Route 53.
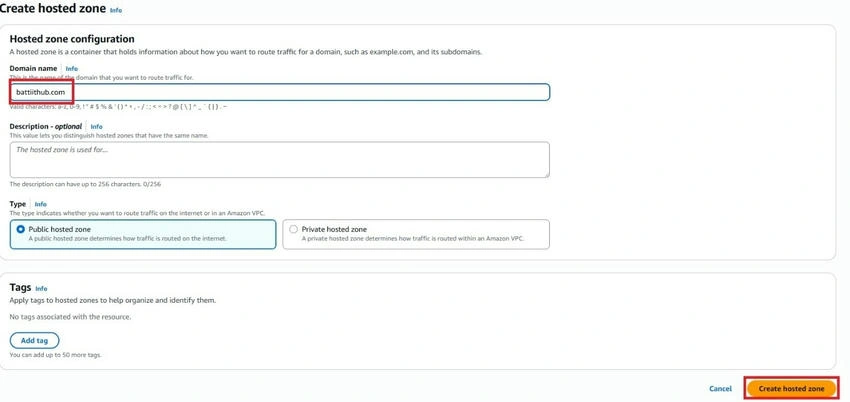
Step 2. Click Hosted zones under the Route 53 and click Create hosted zone.

Step 3. Enter your domain name, choose the type of public hosted zone, and click Create Hosted Zone.
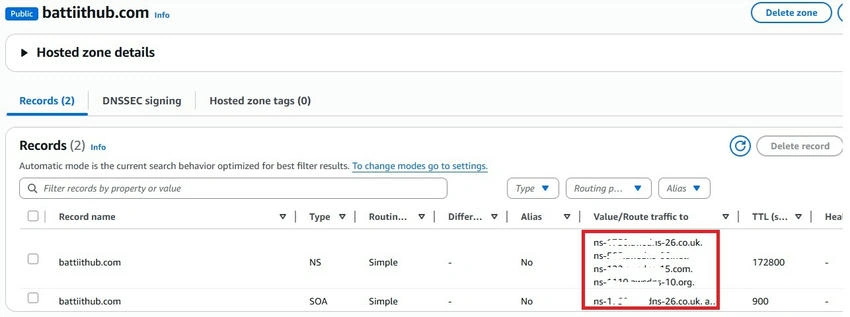
Step 4. Open the record and copy the Name servers.
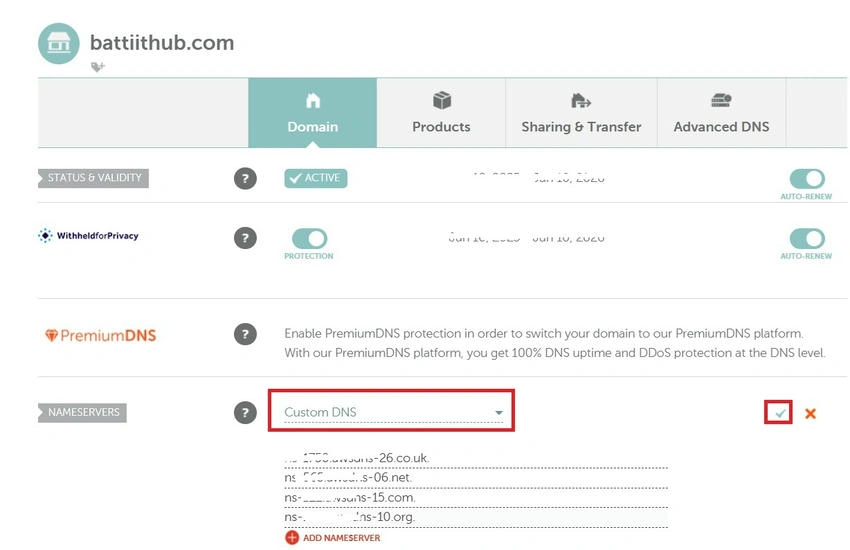
Step 5. Log in to your domain provider and replace the name servers. Depending on the service provider, this change will take a few hours.
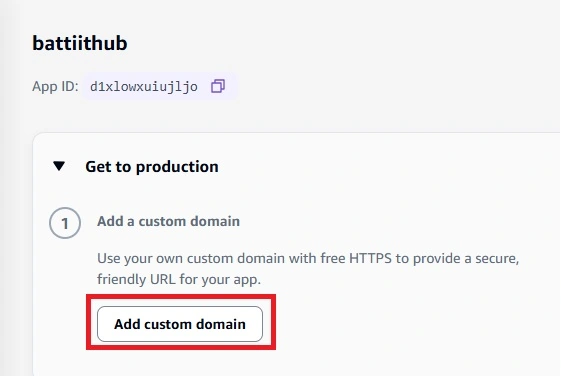
Step 6. Go to the AWS Amplify, select the Apps, and click Add custom domain.
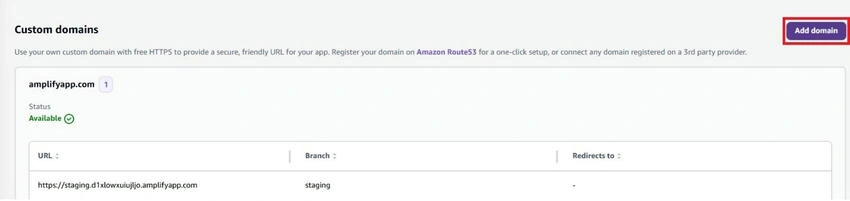
Step 7. In the Custom domain, click Add domain.
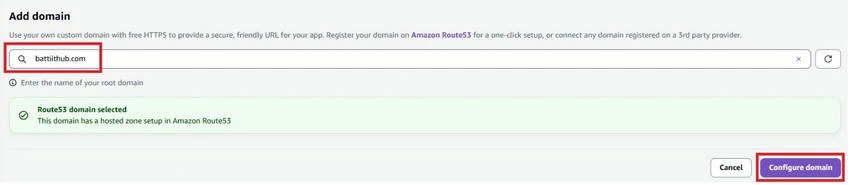
Step 8. Search your domain and click Configure domain.
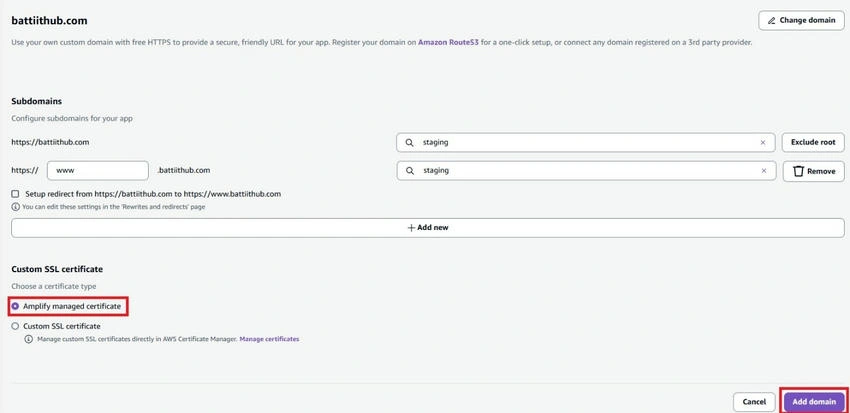
Step 9. Select the Amplify managed certificate and click Add domain.
Summary
This process will take a few minutes to deploy. Once it's deployed, we can access the website.
Join the conversation! Your thoughts help the community grow.