

Overview
Here, some useful links are given to start programming in Android Applications-.
- Android Programming - Day One
- Android Programming - Day Two
- How To Display A Dialog Windows In Android
- How To Display A Progress Dialog Window In Android
- Intent In Android
- Return Data Using Intent Object In Android Applications
- Passing Data Using An Intent Object In Android Applications
- Fragments In Android Applications
- Adding Fragments Dynamically In Android Application
- Fragment Life Cycle In Android Application
- Interaction Between Two Fragments
- Calling In-Built Functions in Android Application
- Intent Object and Intent Filters in Android Application
- Displaying Notifications in Android Applications
- User Interface in Android Applications
- Orientation, Anchoring, Resizing And Repositioning Of Views In Android Application
Introduction
In this article, you will learn about an activity behavior of the views, when screen orientation changes to either portrait or a landscape. In the article Orientation, Anchoring, Resizing And Repositioning Of Views In Android Application, I talked about the different type of screen orientation. The activity life cycle, I have covered in this article, Android Programming - Day Two . Now, it’s very important to know about the activity’s state, when the device changes an orientation.
Implementation
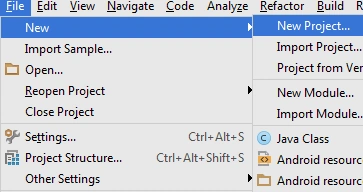
Create a new project by selecting the File->New->New Project.
Add 2 EditText element in the activity_main.xml file. Change the layout as LinearLayout.
- <LinearLayout
- xmlns:android="http://schemas.android.com/apk/res/android"
- xmlns:tools="http://schemas.android.com/tools"
- android:layout_width="fill_parent"
- android:layout_height="fill_parent"
- android:orientation="vertical"
- tools:context=".MainActivity">
- <EditText
- android:layout_width="fill_parent"
- android:layout_height="wrap_content"
- android:id="@+id/txt1"
- />
- <EditText
- android:layout_width="fill_parent"
- android:layout_height="wrap_content"
- android:id="@+id/txt2"
- />
- </LinearLayout>
- package com.example.administrator.orientationapp;
- import android.support.v7.app.ActionBarActivity;
- import android.os.Bundle;
- import android.util.Log;
- import android.view.Menu;
- import android.view.MenuItem;
- public class MainActivity extends ActionBarActivity {
- @Override
- protected void onCreate(Bundle savedInstanceState) {
- super.onCreate(savedInstanceState);
- setContentView(R.layout.activity_main);
- Log.d("ChangeStateInfo","onCreate");
- }
- @Override
- public void onStart(){
- Log.d("ChangeStateInfo", "onStart");
- super.onStart();
- }
- @Override
- public void onResume(){
- Log.d("ChangeStateInfo","onResume");
- super.onResume();
- }
- @Override
- public void onPause(){
- Log.d("ChangeStateInfo","onResume");
- super.onPause();
- }
- @Override
- public void onStop(){
- Log.d("ChangeStateInfo","onStop");
- super.onStop();
- }
- @Override
- public void onDestroy(){
- Log.d("ChangeStateInfo","onDestroy");
- super.onDestroy();
- }
- @Override
- public void onRestart(){
- Log.d("ChangeStateInfo","onRestart");
- super.onRestart();
- }
- @Override
- public boolean onCreateOptionsMenu(Menu menu) {
- // Inflate the menu; this adds items to the action bar if it is present.
- getMenuInflater().inflate(R.menu.menu_main, menu);
- return true;
- }
- @Override
- public boolean onOptionsItemSelected(MenuItem item) {
- // Handle action bar item clicks here. The action bar will
- // automatically handle clicks on the Home/Up button, so long
- // as you specify a parent activity in AndroidManifest.xml.
- int id = item.getItemId();
- //noinspection SimplifiableIfStatement
- if (id == R.id.action_settings) {
- return true;
- }
- return super.onOptionsItemSelected(item);
- }
- }
Explanation
Run the Application by clicking F11 on either Android Emulator or device. When the views are in portrait mode, it looks like the image, given below,
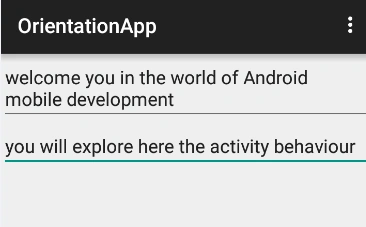
The state sequence is in the following order when the views are in the portrait state initially,

As soon as the state is changed from portrait to landscape, it looks like the image, given below,
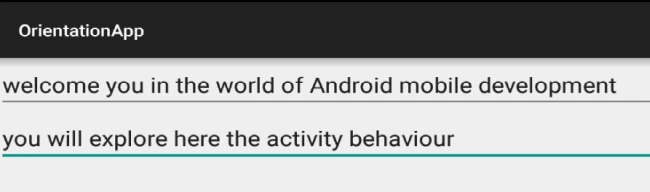
The state sequence is in the following order,

From the above output, we see that the activity is destroyed or resumed when the device changes the orientation from landscape to portrait or vice versa.
Afterward, it again recreates.
Thus, it is very important to understand the behavior because you need to ensure that you take the necessary steps to preserve the state of your activity before it changes orientation. Suppose, your activity may have the variables that contain the values, required for some calculations in the activity. For any activity, you will have to save whatever state you need to save in the onResume() method, which is fired every time the activity changes an orientation.
There is another important behavior to understand. Is it only View which has some Id defined in an activity? They will have their state persisted when the activity they are contained in is destroyed or resumed. Suppose, the user may change an orientation while entering some text into an EditText View. When this happens, any text inside the EditText View will persist; and restored automatically when the activity is recreated.
Conclusion
In the article, you learned the activity behavior when the screen orientation changes. In the next article, I will explain about persisting the state information, when changes in configuration occur.
Roshan GuragainPosted Oct 16, 2016, 6:43 AM
Nice one.its helpful...
kalu singh raoPosted Aug 31, 2016, 8:15 AM
Nice share