

Introduction
In this article I have explained how to insert the records in one table and after using an insert trigger on the table, the records are automatically stored in another table. You can see the After Update Trigger in my next article.
Trigger
Triggers are database objects that are automatically executed when DDL or a DML command statement is executed. Triggers are used to evaluate the data before or after data modification using DDL/DML statements. Triggers are an action performed implicitly.
Why we use Triggers?
- Provide auditing
- Prevent invalid transactions
- Maintain Synchronous table replicates
- Modify table data when DML statements are issued against views
- Automatically generate derived column values
After Triggers
"After" triggers are fired by the DML statements and can be defined only on tables, not on views. "After" triggers are executed after an insert, update or delete on a specified table.
- After Insert Trigger
- After Delete Trigger
- After Update Trigger
Create Table-1
Create Database DemoTriggers
use DemoTriggers
Create table Table1
(
CustID int primary key,
CustName varchar(max),
CustAddress nvarchar(max),
PaidAmmount decimal
)
Create Table-2
Create table Table2
(
CustID int primary key,
CustName varchar(max),
CustAddress nvarchar(max),
PaidAmmount decimal
)
Create Procedure for Insertion
create proc InsertData
@cid int,
@cname varchar(max),
@cadd nvarchar(max),
@pammount decimal
as
begin
insert into Table1 values(@cid,@cname,@cadd,@pammount)
end
Create Trigger For Insert
create trigger insertMyTRIGGER on Table1
after insert
as
declare @cid int;
declare @cname varchar(max);
declare @cadd nvarchar(max);
declare @pammount decimal;
select @cid=i.CustID from inserted i;
select @cname=i.CustName from inserted i;
select @cadd=i.CustAddress from inserted i;
select @pammount=i.PaidAmmount from inserted i;
insert into Table2 values(@cid,@cname,@cadd,@pammount)
The create trigger statement creates a trigger and an "on" clause specifies the table name on which the trigger is to be attached. In the trigger body the table named "inserted" has been used. It is a logical table and contains the row that has been inserted.
Now I want to show the effect of an "after insert" trigger in the database; just use the following procedure.
Step 1:
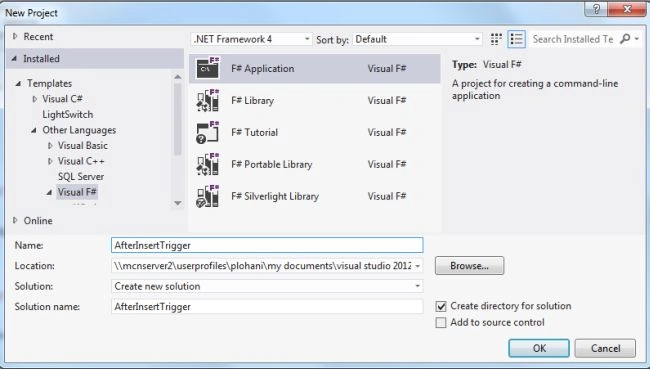
Open Visual Studio then seelct "Create New Project" --> "F# Console Application".
Step 2:
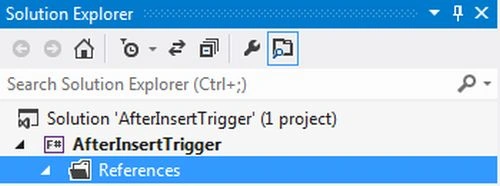
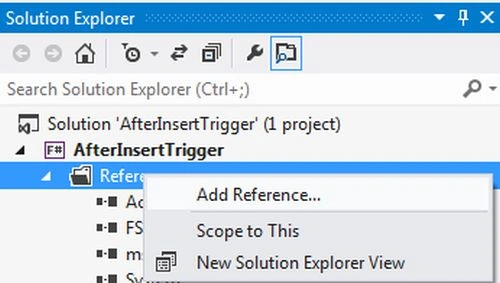
Now go the Solution Explorer on to the right side of the application. Select the references and right-click on it and select "Add references".
Step 3:
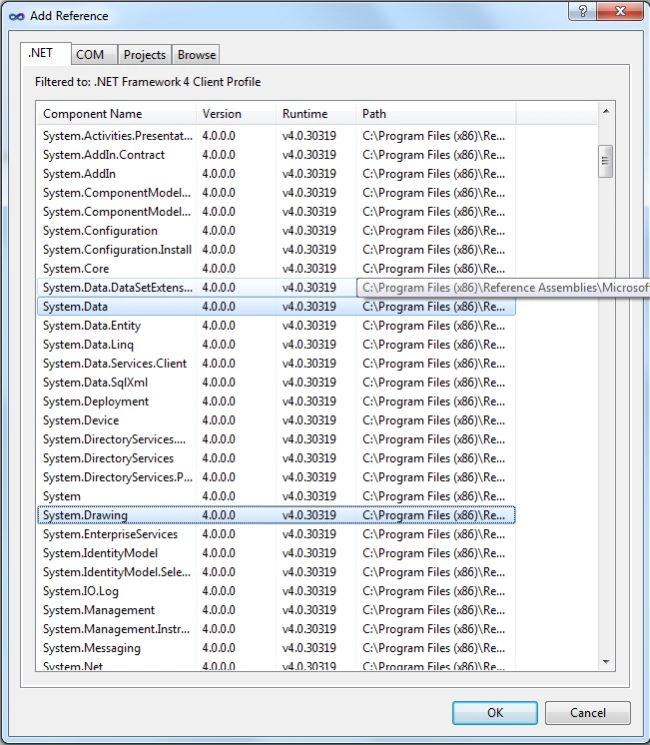
After selecting "Add References", in the framwork template you need to select "System.Windows.Forms", "System.Drawing", "System.Xml" and "System.Data" while holding down the Ctrl key and click on "Ok".
Step 4:
Write the following code in the F# editor:
//Importing Namespaces
open System
open System.Windows.Forms
open System.Drawing
open System.Data.SqlClient
open System.Data
// Creating Form & User Controls
let MyForm = new Form(Height =400, Width = 500)
// Labels
let lblId = new Label(Top =20 , Height =30, Width = 120)
let lblName = new Label(Top =50 , Height =30, Width = 120)
let lblAddress = new Label(Top =80 , Height =30, Width = 120)
let lblPammount = new Label(Top =110 , Height =30, Width = 120)
let lblbfinsert = new Label(Top =190 ,Left=30, Height =20, Width = 80)
let lblafinsert = new Label(Top =190 , Left=250, Height =20, Width = 80)
// TextBoxes
let txtID = new TextBox(Top =20, Left =120)
let txtName = new TextBox(Top =50, Left =120)
let txtAddress = new TextBox(Top =80, Left =120)
let txtPamount = new TextBox(Top =110,Left=120)
lblId.Text <- "Customer ID:"
lblName.Text <- "Customer Name :"
lblAddress.Text <- "Customer Address :"
lblPammount.Text <- "Paid Ammount"
lblbfinsert.Text <- "Before Insert"
lblafinsert.Text <- "After Insert"
let btnSave = new Button(Top =150, Left =80, Height =20, Width =60)
let btnTable1 = new Button(Top =210, Left =30, Height =20, Width =60)
let btnTable2 = new Button(Top =210, Left =250, Height =20, Width =60)
btnSave.Text <- "SUBMIT"
btnTable1.Text <- "TABLE-1"
btnTable2.Text <- "TABLE-2"
//Adding Controls to Form
MyForm.Controls.Add(lblId)
MyForm.Controls.Add(lblName)
MyForm.Controls.Add(lblAddress)
MyForm.Controls.Add(lblPammount)
MyForm.Controls.Add(lblbfinsert)
MyForm.Controls.Add(lblafinsert)
MyForm.Controls.Add(txtID)
MyForm.Controls.Add(txtName)
MyForm.Controls.Add(txtAddress)
MyForm.Controls.Add(txtPamount)
MyForm.Controls.Add(btnSave)
MyForm.Controls.Add(btnTable1)
MyForm.Controls.Add(btnTable2)
//Database Connectivity
let constr = @"Data Source=MCNDESKTOP34;Initial Catalog=DemoTriggers; User Id=sa; Password=mcn@123"
let con = new SqlConnection(constr)
let com1 = new SqlCommand()
let ds = new DataSet()
//Insert record into DataBase using Stored procedure
btnSave.Click.Add(fun _->
con.Close()
com1.Connection <- con
con.Open()
com1.CommandType <- CommandType.StoredProcedure
com1.CommandText <- "InsertData" // is a stored procedure
com1.Parameters.AddWithValue("@cid",txtID.Text) |> ignore
com1.Parameters.AddWithValue("@cname",txtName.Text ) |> ignore
com1.Parameters.AddWithValue("@cadd",txtAddress.Text) |> ignore
com1.Parameters.AddWithValue("@pammount",txtPamount.Text) |> ignore
com1.ExecuteNonQuery()|> ignore
con.Close()
MessageBox.Show("Records Saved in Table-1..")|>ignore
txtID.Clear()
txtName.Clear()
txtAddress.Clear()
txtPamount.Clear()
txtID.Focus() |>ignore
)
btnTable1.Click.Add(fun _ ->
let adapter = new SqlDataAdapter("select * from Table1",con)
let ds = new DataSet()
adapter.Fill(ds) |>ignore
let gridview = new DataGridView(Top=250,Width=420, Height=150)
MyForm.Controls.Add(gridview)
gridview.DataSource <- ds.Tables.[0]
)
btnTable2.Click.Add(fun _ ->
let adapter = new SqlDataAdapter("select * from Table2",con)
let dt = new DataTable()
adapter.Fill(dt) |>ignore
let gridview = new DataGridView(Top=250,Left=250,Width=380,Height=150)
MyForm.Controls.Add(gridview)
gridview.DataSource <- dt
)
Application.Run(MyForm)
Step 5:
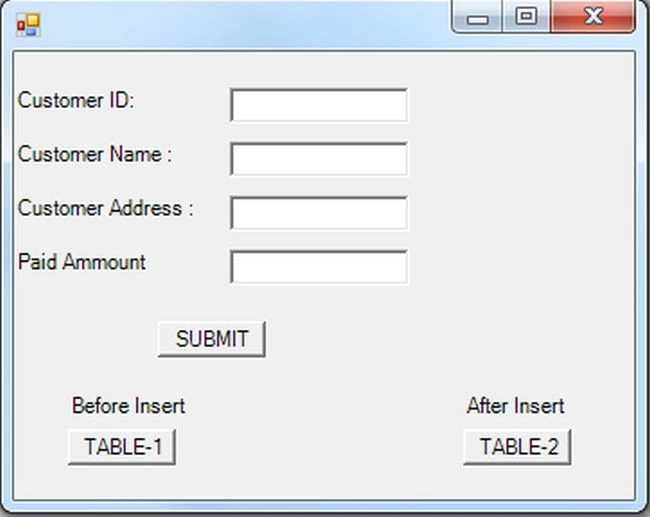
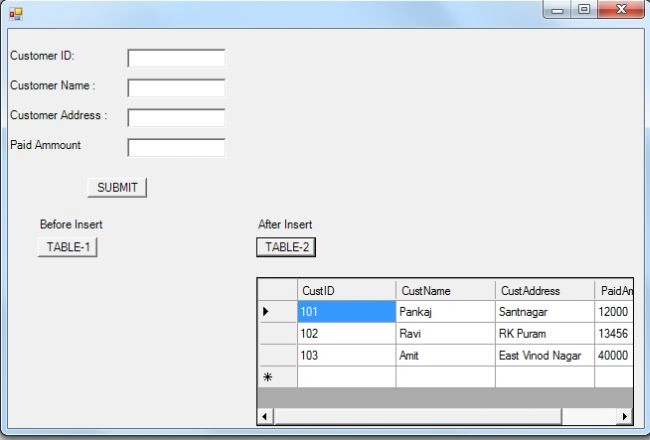
Debug the application by pressing F5 to execute the Windows Forms application. After debugging the application you will get a Windows Forms application as in the figure below.
Step 6:
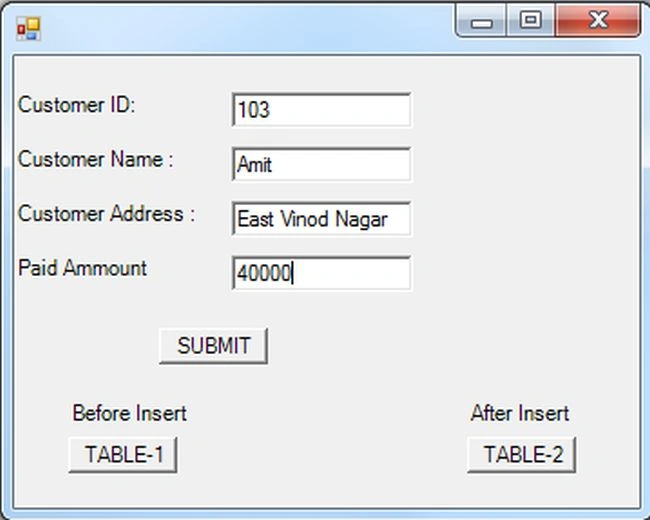
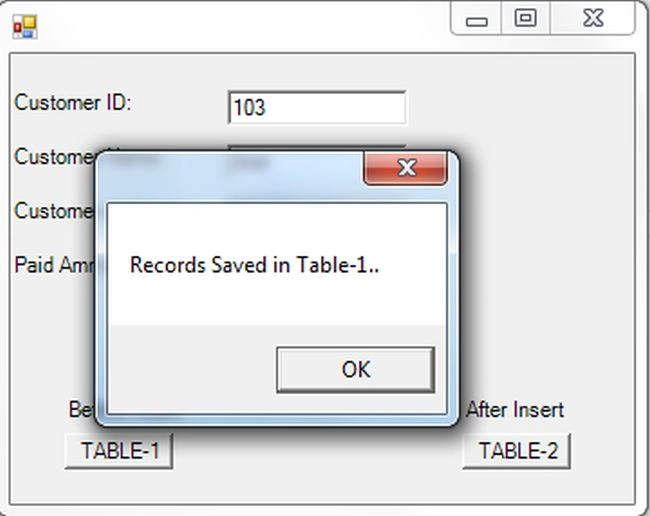
Enter the records in textboxes. These values are first saved in the Table-1 in database.
Step 7:
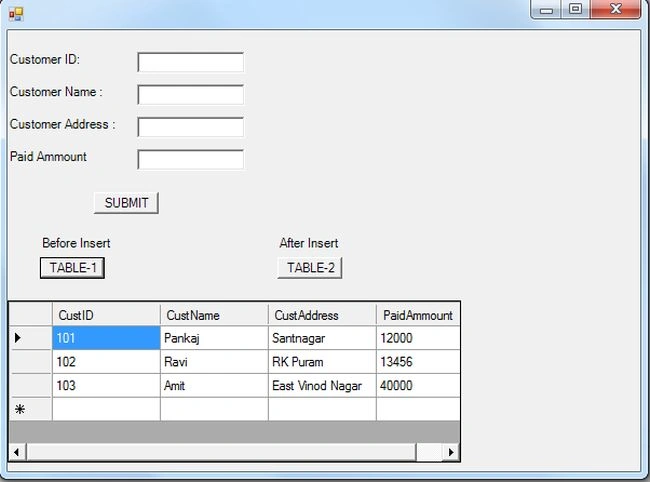
Click on Table-1.
Step 8:
Click on Table-2
Summary
In this article you saw how to create an "after insert" trigger on a table. First we explained the trigger and how to use the "after insert" trigger and why we use the triggers.
Join the conversation! Your thoughts help the community grow.