

Introduction
This is a simple application for beginners that shows how to create an animated menu using HTML 5 and CSS tools. We know that HTML 5 is the advanced version of HTML. Basically HTML 5 can be used to develop 3D applications. This article is intended to help with the use of HTML5 tools to develop animated menu applications. CSS is the acronym for Cascading Style Sheet that is used for design. CSS defines how HTML elements are to be displayed. Canvas is an important tag of an HTML 5 that is used to show the image and text in an HTML 5 application. I hope this article helps to develop an animated menu using HTML 5 and CSS tools.
Step 1: Open Visual Studio.
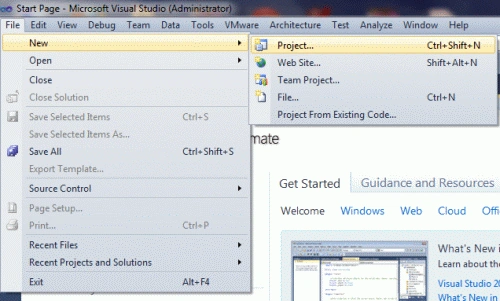
- Go to file -> New->Projects.
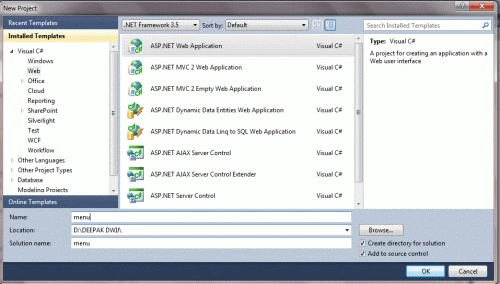
- Create an ASP. NET Web Application.
- Name of "menu.aspx".
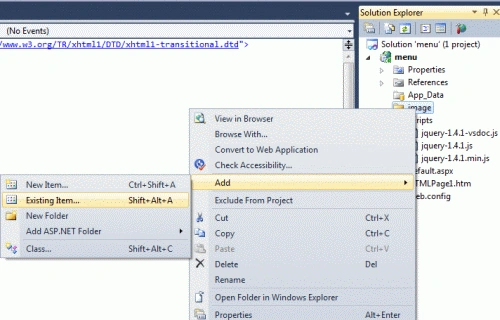
- Right-click on the Solution Explorer.
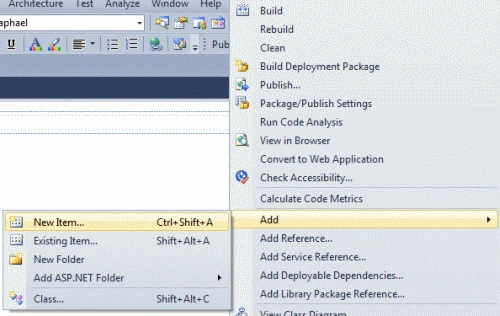
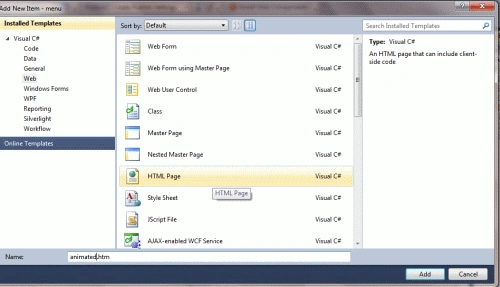
- Add->add new item->HTML form.
- The Name of the HTML form is "animated.html".
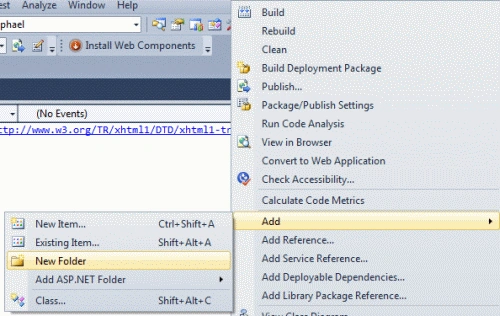
- Right-click on the Solution Explorer.
- Add-> New Folder.
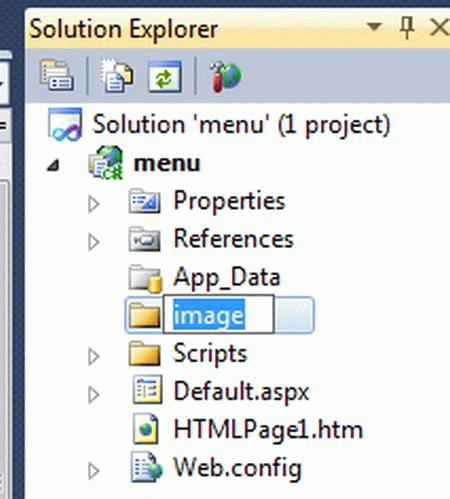
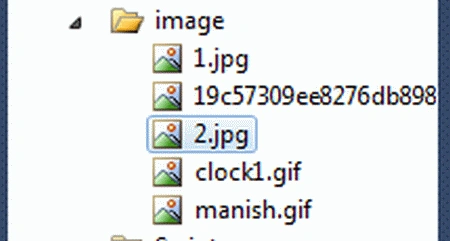
- Set the name of the folder to "image"
Code
- .Rib
- {
- display:inline-block;
- }
- .Rib:after, .Rib:before
- {
- margin-top:0.5em;
- content: "";
- float:left;
- border:1.5em solid #ff99ff;
- }
- .Rib:after
- {
- border-right-color:Blue;
- }
- .Rib:before
- {
- border-left-color:Lime;
- }
- .Rib a:link, .Rib a:visited
- {
- color:Green;
- text-decoration:none;
- float:left;
- height:3.5em;
- overflow:hidden;
- }
Step 5: In this step, we set a background image of an animated menu application and set the color of a mouse hover event.
Code
- body
- {
- background:url(/image/1.jpg) 0 0 repeat;
- padding:35px 0 0;
- margin:auto;
- text-align:center;
- }
- .Rib a:hover span
- {
- background:Aqua;
- margin-top:0;
- }
Step 6: Now we have set the content of an animated menu.
Code
- <body bgcolor="#00ffff">
- <h1>Tom daveloped a animated menu</h1>
- <div class='Rib'>
- <a href='#'><span>Home</span></a>
- <a href='#'><span>Forums</span></a>
- <a href='#'><span>Videos</span></a>
- <a href='#'><span>Adverties</span></a>
- <a href='#'><span>Downlodes</span></a>
- <a href='#'><span>Blogs</span></a>
- <a href='#'><span>Jobs</span></a>
- <a href='#'><span>Training</span></a>
- </div>
- </body>
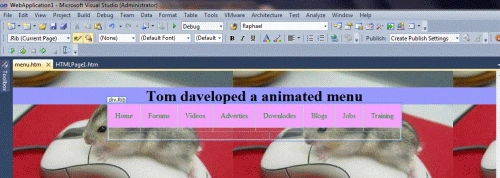
Code
- <html>
- <head>
- <title>Tom application</title>
- <style type="text/css">
- * {
- margin:0;
- padding:0;
- }
- body
- {
- background:url(/image/1.jpg) 0 0 repeat;
- padding:35px 0 0;
- margin:auto;
- text-align:center;
- }
- .Rib
- {
- display:inline-block;
- }
- .Rib:after, .Rib:before
- {
- margin-top:0.5em;
- content: "";
- float:left;
- border:1.5em solid #ff99ff;
- }
- .Rib:after
- {
- border-right-color:Blue;
- }
- .Rib:before
- {
- border-left-color:Lime;
- }
- .Rib a:link, .Rib a:visited
- {
- color:Green;
- text-decoration:none;
- float:left;
- height:3.5em;
- overflow:hidden;
- }
- .Rib span:before
- {
- content: "";
- position:absolute;
- top:3em;
- left:0;
- border-right:0.5em solid #9B8651;
- border-bottom:0.5em solid #fff;
- }
- .Rib span:after
- {
- content: "";
- position:absolute;
- top:3em;
- right:0;
- border-left:0.5em solid #9B8651;
- border-bottom:0.5em solid #fff;
- }
- </style>
- </head>
- <body bgcolor="#00ffff">
- <h1>Tom daveloped a animated menu</h1>
- <div class='Rib'>
- <a href='#'><span>Home</span></a>
- <a href='#'><span>Forums</span></a>
- <a href='#'><span>Videos</span></a>
- <a href='#'><span>Adverties</span></a>
- <a href='#'><span>Downlodes</span></a>
- <a href='#'><span>Blogs</span></a>
- <a href='#'><span>Jobs</span></a>
- <a href='#'><span>Training</span></a>
- </div>
- </body>
- </html>
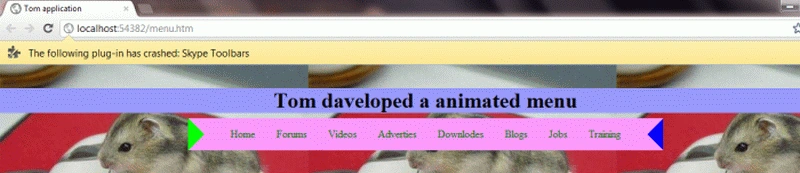
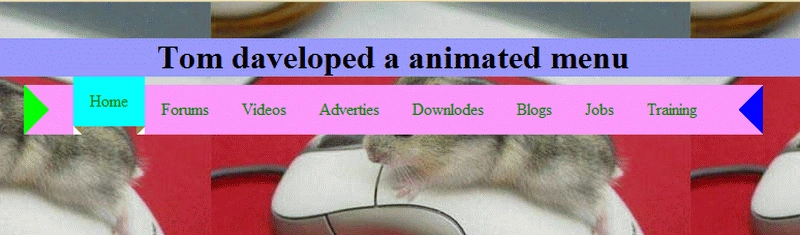
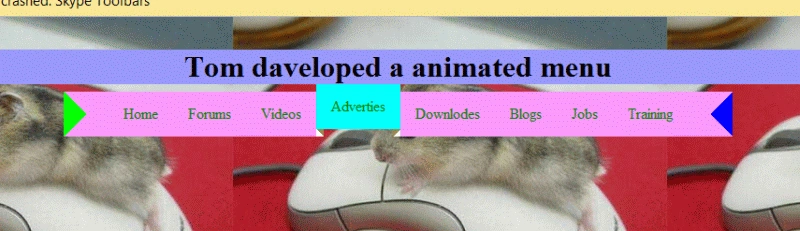
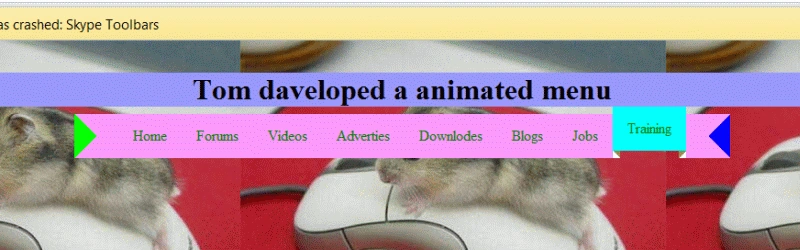
Step 8: Press Ctrl + F5 to run the application in the browser.
Output
Resources
Here are some useful resources
Arjun DhilodPosted Jul 9, 2015, 9:22 AM
Hi Manish If i am beginner in html5 how can develop this application because i thing you used some jquery library it is very important you must tell us about jquery
Sanjay SinghPosted Jun 30, 2014, 2:47 PM
wow very nice work sir..